I am finally motivated enough to get myself back in front of the bench and actually build something - about freaking time! As you (regular readers) may well know, one of my 2012 resolutions was to sell some of the things I make. Well this has been achieved by selling my Rustic Stool and has given me incentive to make a few more to sell. Mainly, to recoup some of the money I have tied up in timber.
The session began by discovering my bench top was no longer flat, maybe due to the arrival of Spring and the warm weather we have been having lately or my bench repairs I did a short while ago? Either way, before anything else could happen it was time to warm up with my trusty no#6 foreplane and a straight edge.
Once the top was vaguely flat, I also remembered I had yet to re-drill the dog holes to make the bench usable. A few minutes later I was ready to finally begin work ... no I wasnt. As I havent been doing much wood work lately, I knew things would need a bit of a sharpen. My first tasks would be dimensioning the leg stock and processing the rough cut seat tops.
Two large chisels, my marking knife and the no#6 plane blade, all sharp and ready to go...
I had previously rough cut four pieces of stock from one of my scaffold boards to make four stool seats, one small, two mid size and one slightly longer - all the same scaffold board width. I also had twelve meters of 2"x2" Pine leg stock.
Work began by planing the seat tops to remove all the rough saw marks to make marking out easier and basically get them flat. First across the boards, then diagonally and finally with the grain. This process allowed me to familiarise myself with the directions of grain flow and mark the boards where it changed direction etc.
The next step was to use a straight edge and get one of the long sides straight, followed by making the opposite side both straight and parallel. Luckily the boards werent to bad and this went quite smoothly.
To be honest, I know from previous experience that the stools joinery is not too dependant on the seat tops being perfectly flat and square so I wasnt to obsessed with getting them perfect - its a rustic stool after all!
I did notice that the two medium size seat pieces were showing signs of cracking in the end grain, obviously from drying out to quickly. I decided to leave them alone to see how they develop over the next few days and only build two stools - a larger and a small one.
The last step was cutting both ends of the board to get them square with nicely finished end grain using my trusty large tenon saw.
A short while later I had two seat tops ready for joinery. I hadnt smoothed them as this can be done later.
Time to dimension some leg stock...
I decided from my previous stool and the difficulty in finding a suitable size box to post it in, that both stools would have the same size legs, at least to begin with. I am not building from plans so this may change on down the line according to the look of each stool. The main thing is I know both will fit in my planned postage boxes.
Standard procedure, mark all four sides with the knife, pare out the cut line with a chisel and then cut squarely on the bench hook using my Carcass saw. I had to cut around the unusable knotty bits.
I love my Lie Nielsen saws, they are such a joy to use! Im not sure if its because I havent done anything for a while but my sawing is more accurate then ever! It maybe (and probably is) due to my new adjustable square being more accurate than my larger more cumbersome cheap combination square?
Anyway, there we go ... Two seats and eight legs. The sun is out so thats enough for today, time to go and plant out some carrots in the sunshine.
This is the hardest part of this project, at least in my opinion - Cutting the legs accurately to produce a ten degree splay to the legs. The first thing was to group the eight legs into two lots of four for each stool matching the grain of each set and deciding which would be the visible outward face of each leg, hiding knots and other nasties on the inner faces.
Setting my bevel gauge to 100 degrees to give me my 10 degree splay angle (90 + 10 = 100), I began marking out the legs. unfortunately, I got so engrossed with concentration I didnt take any pictures to fully describe the process.
In addition, I didnt think to limit my marking with the knife as I squared the lines around the legs, resulting in unnecessary marks on the show side of the legs - doh! I will plane and sand them away before assembly.
Luckily I noticed the error of my ways before starting the second set of legs and limited my marking to only those lines to be cut.
With the marking out complete and the waste clearly marked with Xs, I used a chisel to pare out the cross grain lines to make a groove for the saw. Placing the piece offset in the vice, I used the bevel gauge to make the cut vertical. My sawing accuracy is considerably better when cutting straight down vertically, probably due to gravity helping to hold the saw straight.
I started with the shoulder as its a short cut and across the grain, so a nice and easy warm up for my sawing muscles.
Before cutting the rip cuts down what I guess would be called the cheek, I found it easier to use my dovetail saw placed in the knife lines to perform a stopped cut across the corners of the cut on each side before placing the piece in the vice for cutting squarely down.
Despite having done this identical marking out and cutting process a few times now, for both my original Rustic Stool and my Traditional Saw bench, it still takes me a surprisingly long time to carry out this simple task. Eventually, I had four legs all cut and pared, ready for use.
Now for the other four legs - Rinse and repeat as they say ...
The next step is to mark out the four cut-outs in each seat top to accept the legs. Simple marking out using a marking gauge (for the depth of cut) and a square. I set each leg socket back from the seat end the same thickness as the leg.
I made four cuts to each socket to make chiselling out easier with less risk of break out. Using a small chisel to begin with, I removed 80% of the wood from each side of the cut out.
Finally using my larger chisel placed directly in the knife line to finish the cut.
After a little paring with the chisel and size adjustment with a file, I had two standing stools.
Still a long way from being finished but at least they resemble something close to stools now.
Ok ... next comes the leg bracing for our stools. Each stool will have a lap jointed brace across each pair of opposing legs (Ill call it a side brace) and a longer single brace that runs down the center that is lap jointed into the side braces. Make sense?.... Hmn... maybe better explained in pictures.
First, the lap joint sockets need to be marked in the legs.
After marking out using the knife and being careful to get the complimentary 10 degree splay angle in the correct direction, I pared the cut lines with a chisel, before making three cuts per socket to help allow the waste to be easily removed with a chisel.
Two stools with four legs each, times three cuts per leg equals twenty four cuts to be made just for half a lap joint. What seems like an easy process seems to take me a lot longer than I think it will. Its easy to kill a few hours and not achieve an awful lot of progress...
Using the vice to hold the stock flush with my marking lines, I used the smaller chisel to remove most of one side of the socket to the center.
Then I flipped the work piece around to do the other side.
Then used the large chisel places directly in the baseline, using the vice jaws to keep the chisel face flat.
Finally finishing off by hand and paring away any roughness.
Now it was back to the bench hook to cut four lengths of wood, two braces per stool.
I placed the square braces directly into the sockets in the legs and marked out the joints to be cut with the seat top attached using a pencil. It was nice to see the pencil marks agreeing with both my square and bevel gauge almost exactly, meaning my joints must be acceptable and the stool is remaining pretty square.
Its actually starting to look a bit like a stool... The center brace (just sitting in place in the picture above) is nice and straight forward with the joints cut at a sensible 90 degrees and therefore there is no messing around with bevel gauges. A couple of minutes center finding using dividers, some squared lines with the knife and a few strokes of the saw and a bit of chisel work later ...
We have a stool! On my previous stool I cut the center brace flush with the side braces, but this time I thought I would try and make a feature of the end grain of the center brace which in turn will result in a stronger joint. In fact, even without any glue I was able to sit on the stool - albeit very carefully! So ... Now repeat all the above for the other stool. *Sigh* I kind of wish I had done one stool at a time now as the progress would have been a lot faster. Its surprising how much time it takes to build such a simple little project.
Still to do:
Bevel and smooth all the edges and surfaces.
Dry fit and final trimming of joinery, before glue up.
Flush cut all the joints and trim the legs to match the splay angle so the feet sit square.
I really need to check stuff out before I go blathering on. I thought yesterdays video was in German. I have an untrained ear. Thank you everyone who informed me that it is Dutch, or more specifically, Belgian Dutch: Flemish. Sorry! Peter the Clown is awesome though. I like him in any language. There seems to be a large number of Northern European Mere Mortal woodworkers. Ive really never been anywhere, but Scandinavia is one of those places that just fascinates me: I would love to visit. Vikings rule! (Hey, maybe that accounts for the hardiness of Minnesotans.)Martien de Boer, who is Dutch, sent me this joke about his southern neighbors:
How can you keep a Belgium guy busy for months? Tell him theres a bag of chips in the corner of the circle shaped room.
This is "vlaamse friet", served at a special booth called a"frietkot". According to Martien, "realBelgium chips are the most delicious chips in the world".But wait...that comes with beer??? Im there!!!
Hey you Vikings...send me pictures of your projects. Id love to see them and post them here. Like to see your shops too. ****** Mere Minutes
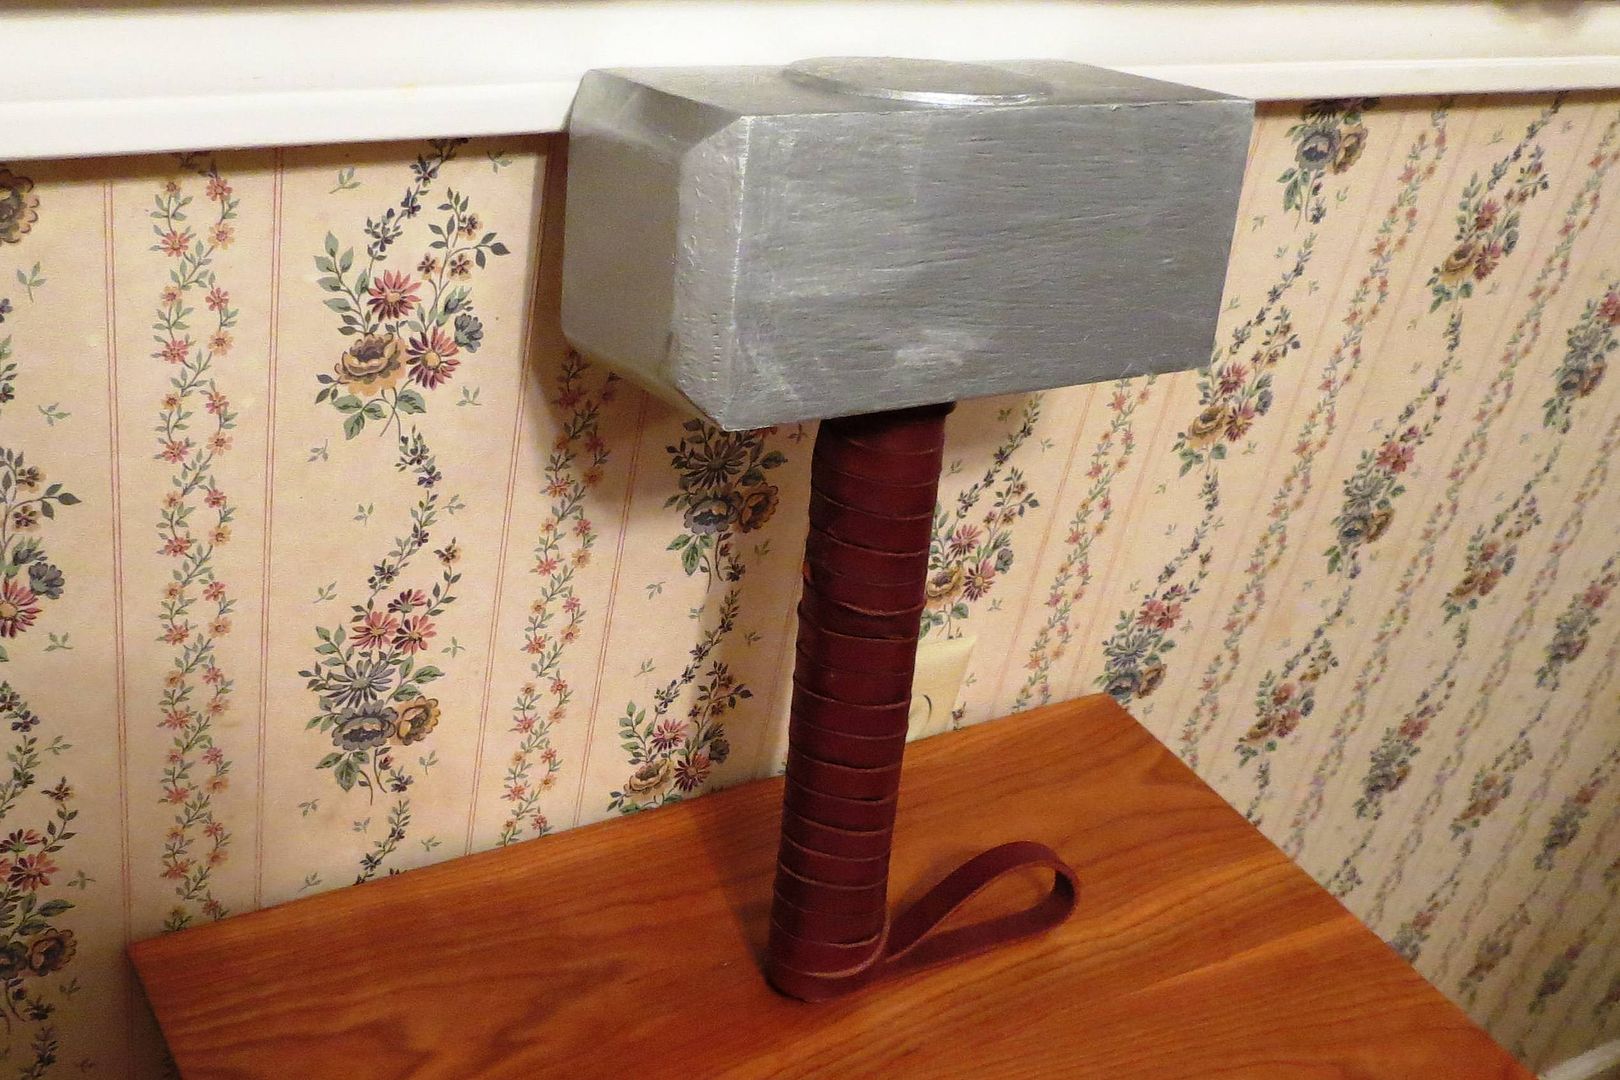
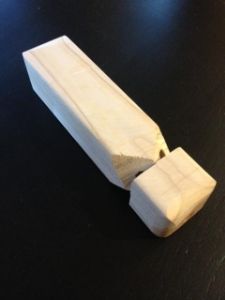
Bill Akins sent me over this picture of a quickie "Thors Hammer".
"After the movie came out, my son was with me in the shop. I was rooting through my cut off bin and pulled out a hunk of 4x4 posts and a closet dowel rod. I held them up and said, “Look Tyler, Thor hammer!” He just had to have one, being the super hero fan that he is. The handle is recessed halfway into the head, screwed from the top and glued in. The handle is wrapped with saddle string."
*****
Justin Thomas is deployed in Kuwait and built this maple and walnut.mallet to use when he gets back home. It looks too nice to use! Update: Justin informed me of something special about this mallet...its filled with Kuwaiti sand! Thants pretty cool.
*****
Heres a solid oak mallet Bill Bumpus made. No added weights added to the head.
*****
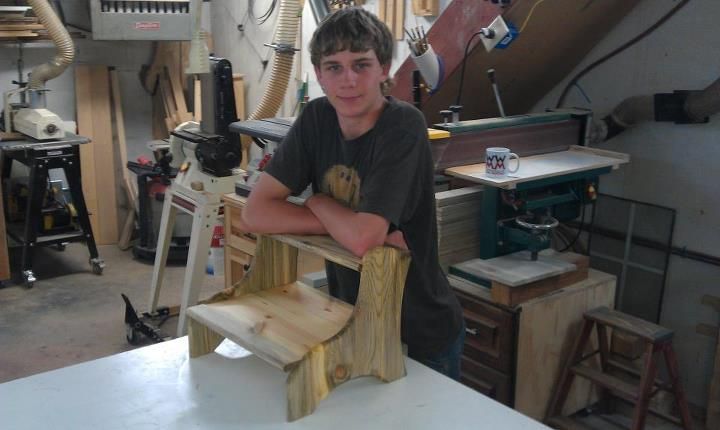
George Raburn is the guy who sent me the beetle-kill pine that I used in last weeks project. Heres his son who made one with the same wood. Looks exactly like mine!
*****
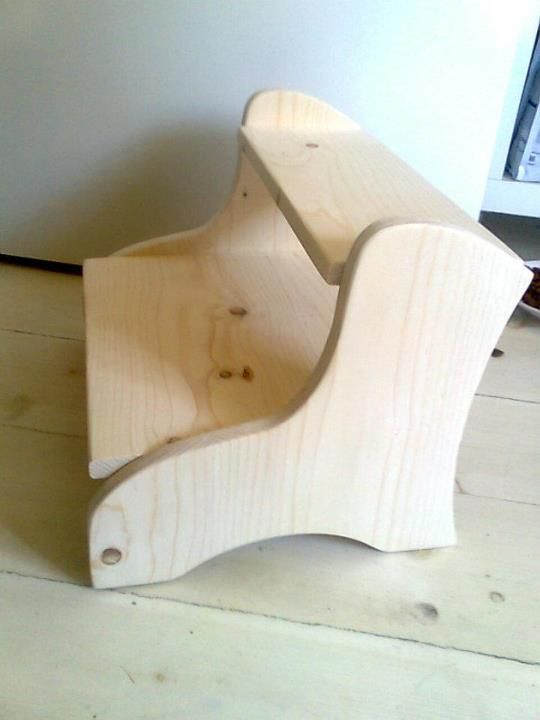
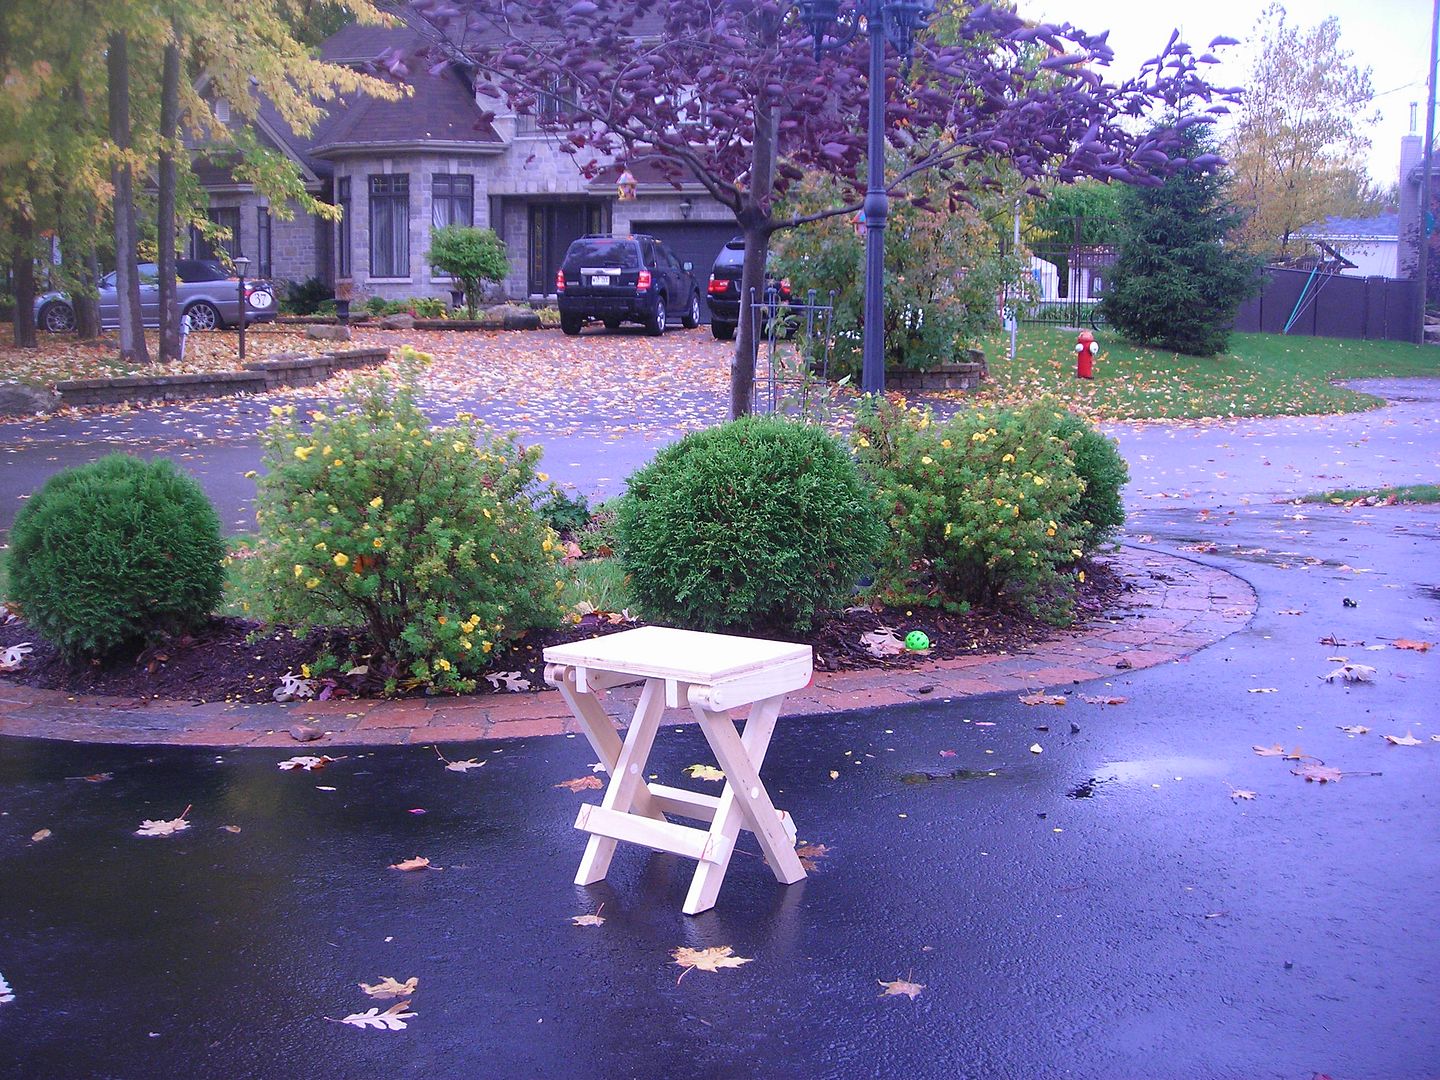
Periklis Therrios was FAST. He built this step-stool hours after I posted my video! It only took him two hours using pocket screws.
A lot of people have made my Jetsons retro wall clock. If you are brand new to woodworking, its a good project to start out with. It doesnt require any expensive tools or fine wood. There are no complicated joints to make. The shapes and sizes of the pieces are not critical, so feel free to cut outside the lines. And paint it any colors you like! Matteo Scalon made two, one for his sons room and one for his daughters. He included numbers to help them learn to tell time.
*****
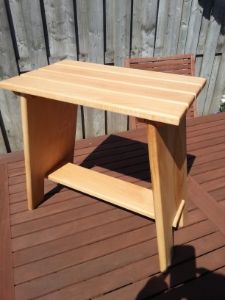
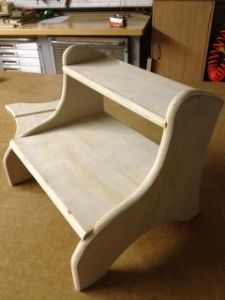
Dwayne in Holland and his wife enjoy watching the fish in their aquarium so he build this stool with that in mind. He made it without plans. Great design!
*****
Wil Wilson made my step stool using my plans from last year. This is another super simple project you can make in an afternoon. I get a lot of use out of mine.
Wil also sent over pictures of my train whistle project. These things make a great sound and kids love them.
*****
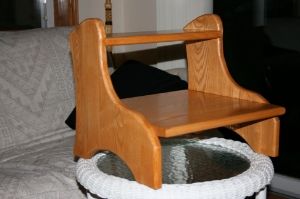
And Randy Dressen made his step stool out of white oak. Looks great!
*****
I am frequently asked if it is okay to make my projects and sell them. Of course! I certainly dont have any time to get into selling my work. As soon as I am done with one project, my mind immediately turns to something new. Give it a shot. A number of people have enjoyed success making and selling on the craft fair circuit. Might give Etsy a try too. Richard Cockerhams been making and selling my device charging stations. I like how each is a little different.
***** Where in the world are you?A couple weeks ago, I invited viewers to create their own wall hangings showing off where they live and post video responses. You can see them all on YouTube, but I thought I would start to showcase a few at a time here too. New Zealand:
Read More..
About two years ago I made a folding step stool and I have always had people asking for plans. Unfortunately, like most of my projects, I never make any detailed plans. To refresh your memory, here is one that Robert Naylor made. (He also made the drill press table with vise I posted last Sunday)
Plans!
Tim Barker took the time to strip down the instructions in my video and actually make a set of plans. Download the PDF here. Thanks Tim!
Heres the video from November 2009:
*****
Finally, I received a really special gift in the mail yesterday from 1st Battalion, 7th Field Artillery. Its flag that was flown in Iraq. It included a photo and document signed by CSM William Bauer and LTC Andrew Gainey. There was no note in the package, though. So if you sent this, let me know! I am planning a project for it to be posted on Veterans Day. 11-11-11 this year!


 We have a stool! On my previous stool I cut the center brace flush with the side braces, but this time I thought I would try and make a feature of the end grain of the center brace which in turn will result in a stronger joint. In fact, even without any glue I was able to sit on the stool - albeit very carefully!