I wanted to answer a few questions about the snowflakes. The most common question was is how to slice them up if you dont have a band saw. In this mere Minutes video I suggest using a handsaw which I think would work pretty well. If you have a scroll way, I think that is another option, assuming its wide enough. If you have any other idea, post them in the comments section. *****
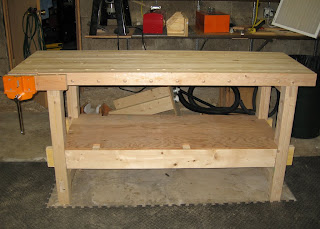
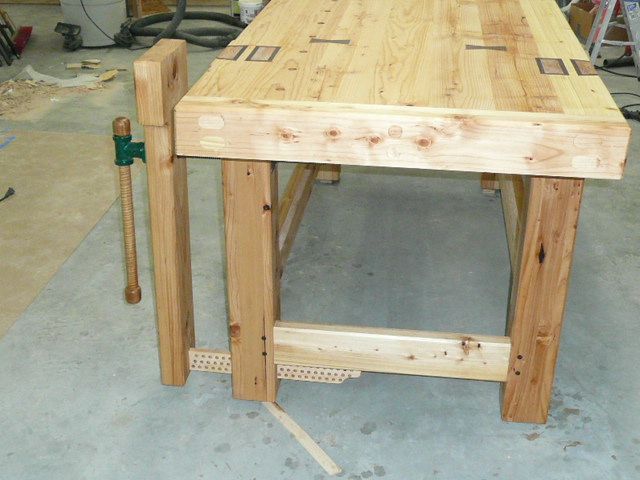
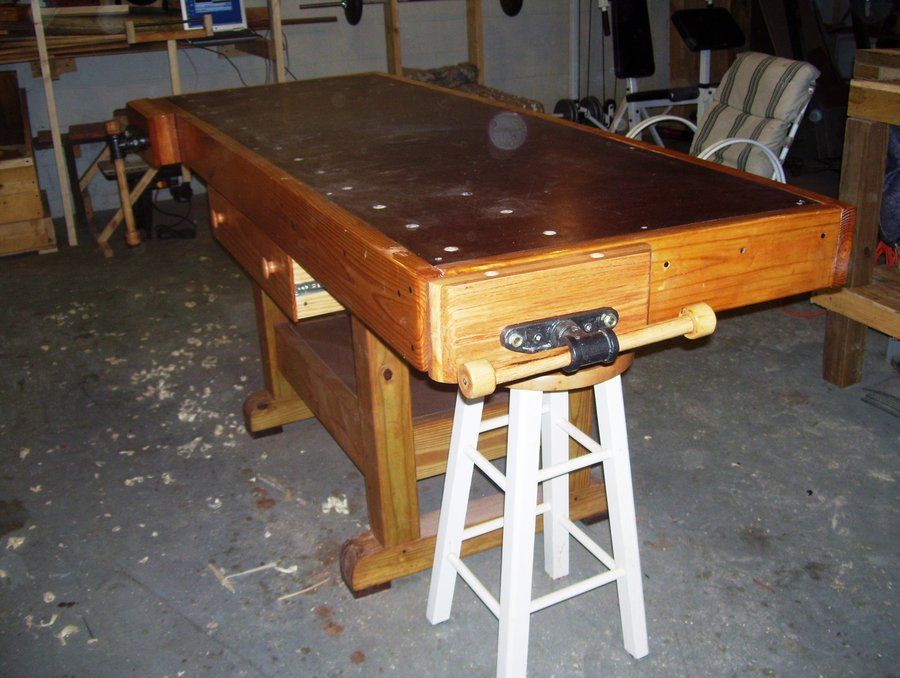
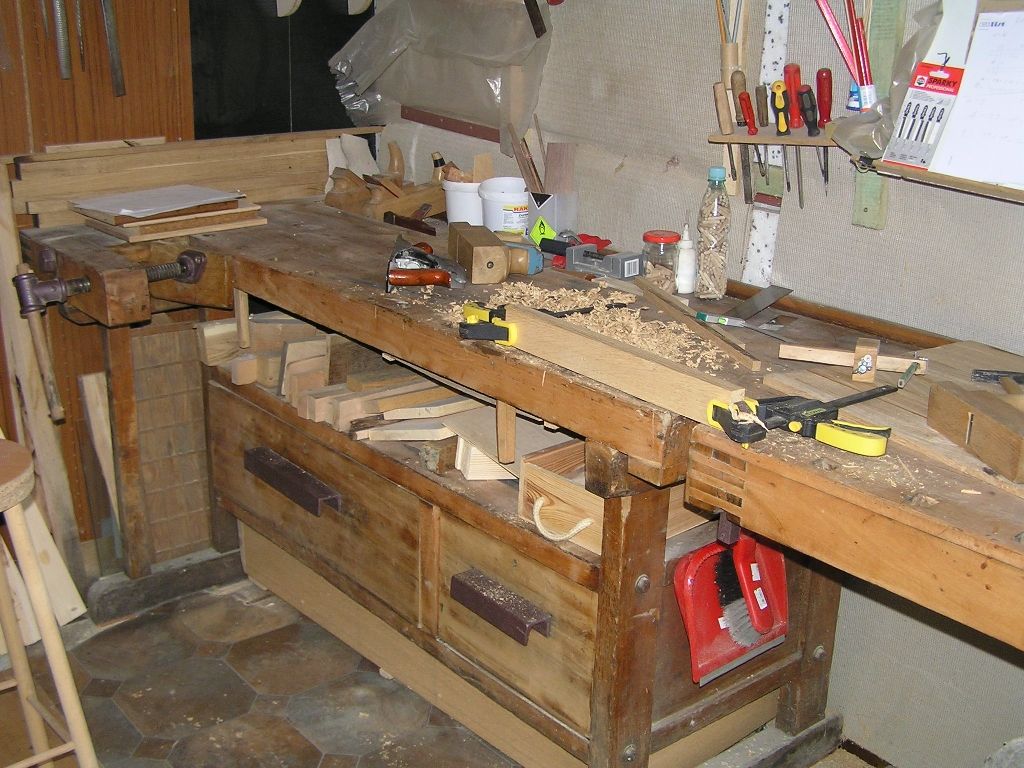
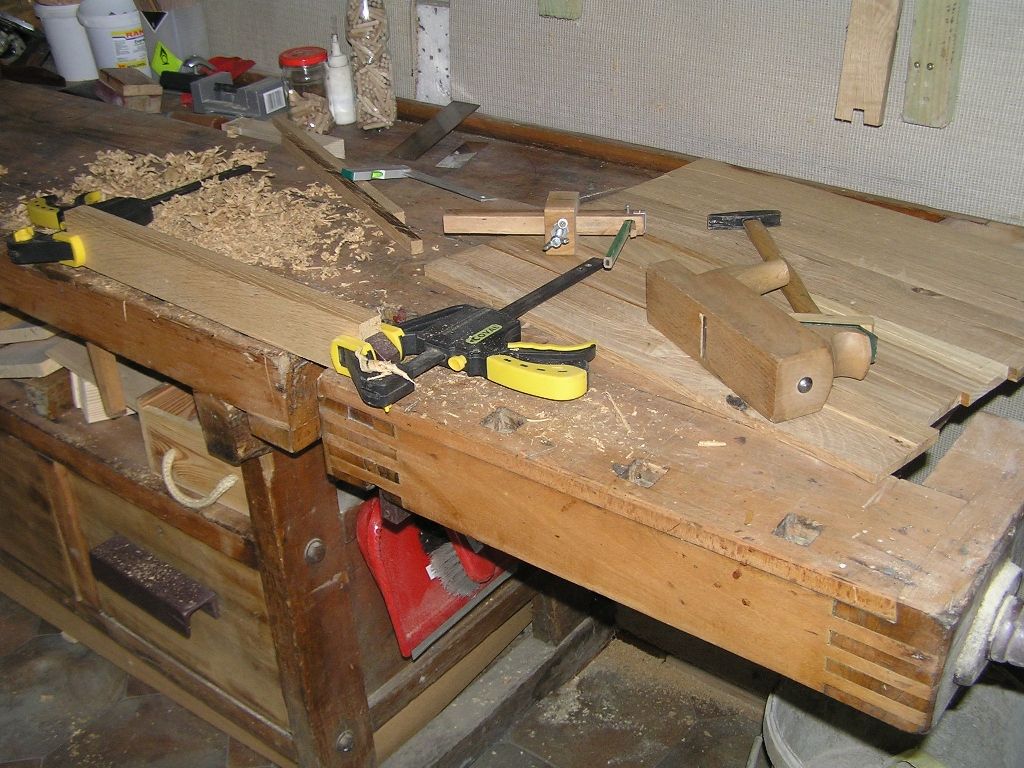
It was one of my first woodworking projects about 10 years ago. It may not be pretty but its heavy and I dont care if it takes a beating. It took me about half a year to build, mostly because I was watching too many Woodrights Shop reruns and thought Id try some joinery that was beyond my skill level. Still no fasteners were used in the making of the bench, only glue.
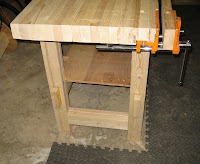
The bench stands 36-1/2" tall -- the height of my table saw on itsstand. The base is made from doubled 2x6s and 2x4s. The top measures 2foot by 6 foot and is made from sixteen 2x4s.
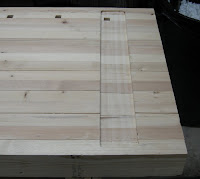
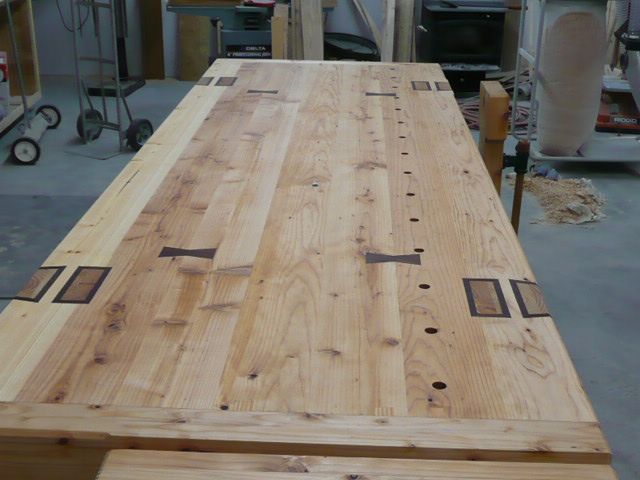
For the top, I cut all the rounded edges off all the 2x4s for the topand cut dadoes every 6" in one of the boards for dog holes. After Iglued the boards together, I flattened the top with a jack plane and a4 foot straight edge.Things Id change:- A recessed tool tray for catching wayward tools would have been nice.- A better vice.- I store other bench top tools under the bench, and have found thestretchers are too high for some of the tools Id like to store.- Id get the top flattened properly.******** Dave HigginsHeres the work bench I built last winter its built with constuction grade lumber everythig is laminated together nothing bigger than a 2x6 was used. The inlay work is my first attempt, and is made with peruvian walnut.
*******Charl Du PlessisThis is my Frankenstein work bench made from wood I salvaged from and old pergola and a deck! It is enormous, 3 meters by 1 meter by 1 meter!! This allows me to have my scrollsaws, bench grinder, and drill press all mounted to it and still have plenty of room on the other side to use as the "bench" part of my workbench without sacrificing alot of the surrounding area in my garage! The side without the tools mounted to it will be getting an MDF top put on it soon to eliminate the gaps between the decking timbers.It certainly isnt pretty but it definitely serves the purpose. But best of all it cost me a bag of screws!!
*******
John Short
Here is what I use. Its simply 3 2x12s glued up and sitting on a metal table in the back yard by my shed. dimensions are 3x6. Its all I can do without a real shop.
*******
Tony ODriscollThis is my pride and joy. 300 pounds plus of Maple with a laminated MDF top. Front and end vices. I only wish I included a traditional shoulder vice rather than the large end end vice. Im very glad I didnt include a tool well. I dont need it. Its 7 by 36".
******* Trevor ScottHeres my bench. Built from leftover 4x2 from the garage reroof. Woodwork vice at one end, engineers vice at the other. Its 9 long so plenty of space for my drill and scroll saw. Slatted mid section gives me plenty of storage for tools, boxes etc. I need to squeeze a midi lathe in this week but that may have to free stand!
More than you ever needed to know about the ladder flipper! Bob Rhoads made the ladder and supplies these actual dimensions:
Rungs are 8.5mm each
Rungs are 61 MM apart at center
Ladder uprights are 36MM s apart on insides
Toy hole is 9mm
Hole is centered 15.5 mm down from each end
Toy is 28 mm wide and 66mm long
When the toy rests on a rung, you should have a 6mm gap in between it and the edge of the rung above it.*********The "Toy-Making Dad" has detailed instructions on his web site. I really should have put a few minutes of research into this project before I started!*********Lane Steinsultz clued me in on this site that has an actual diagram. *********And Finally, Rance Rupp, over on LumberJocks, shot this video:
Wow...I cant believe how many people responded to my Kindle case/stand problems and questions. Some really incredible ideas. I am now thinking about making two in a couple different styles. Thank you all for your help! ***** In my last post I mentioned some of the many versions of my candle holder that have been build. Its really inspiring to see how people re-interpret a simple design. Wanted to show you some of Alex Busados work. Alex is 12 and has some really creative ideas. I really like natural-wood projects.
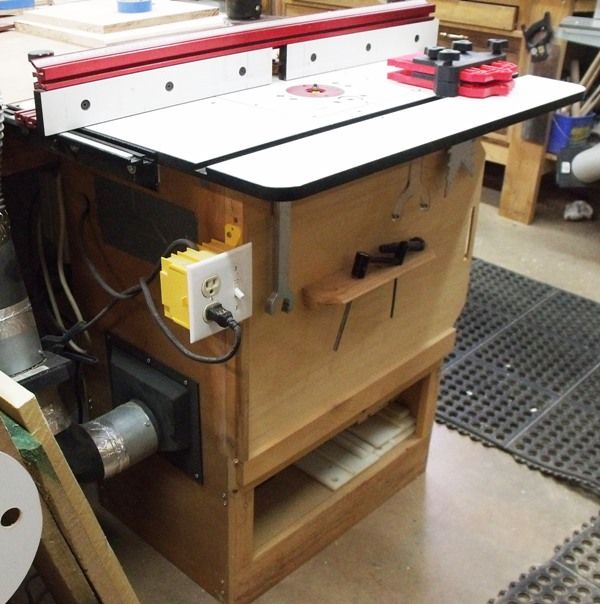
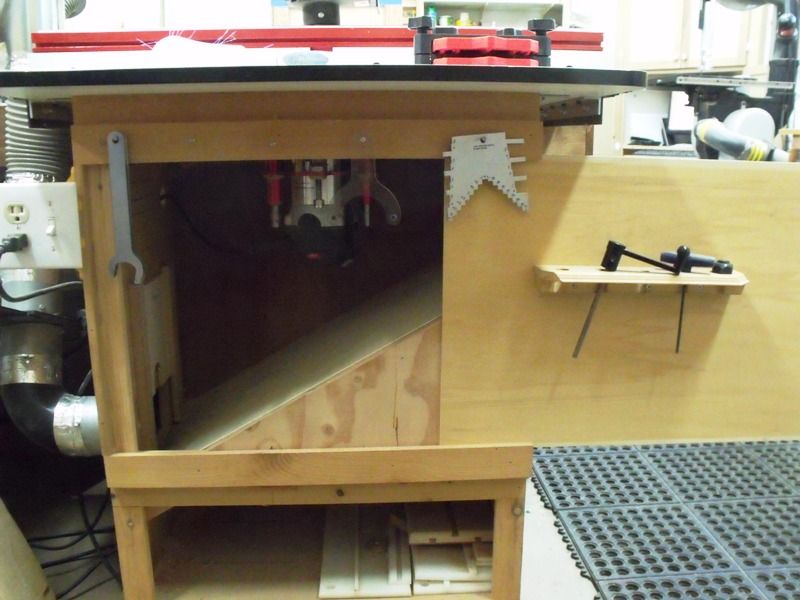
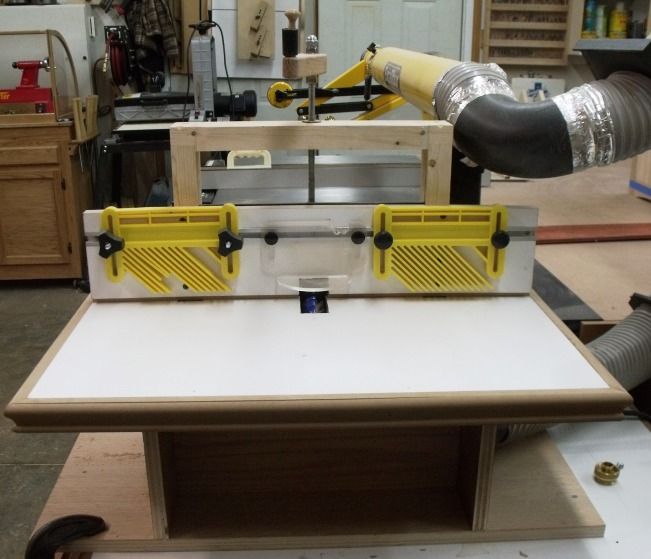
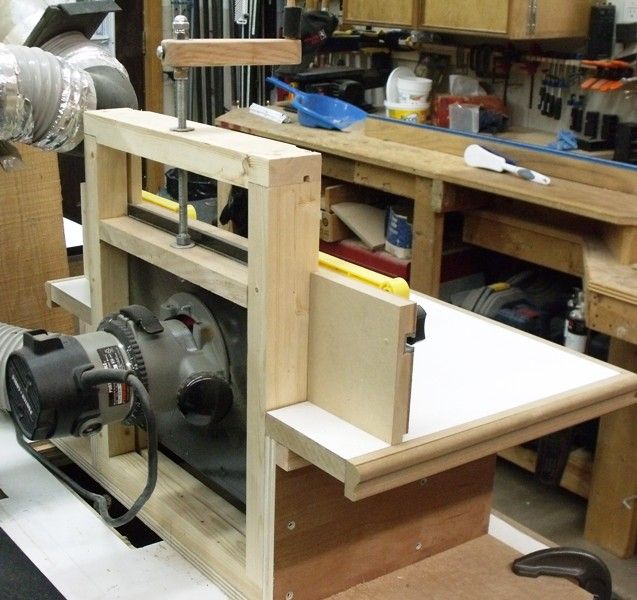
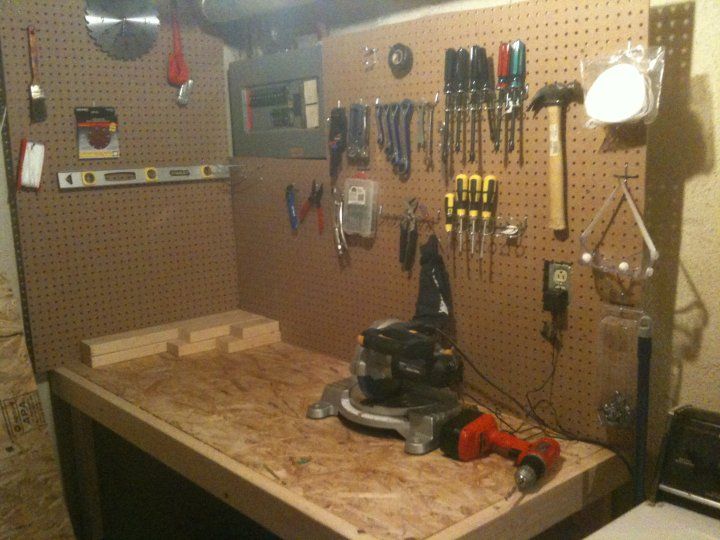
Bruce (Wood Chuck)Bruce uses two router tables. For this one he purchased a Jessem top and fence and built the cabinet underneath for storage and dust collection.
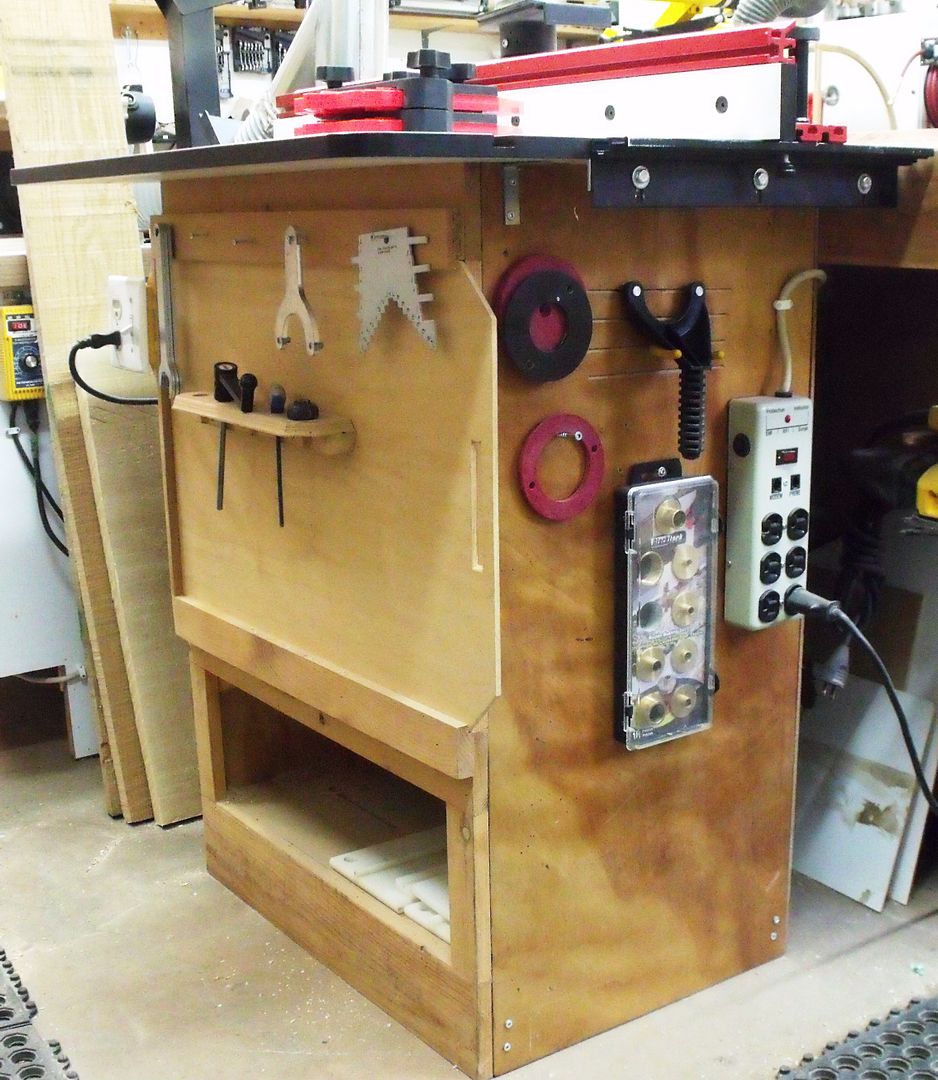
This one is a horizontal router table Bruce built for milling molding and other things that are easier to rout flat, rather than on edge. Nice having the feather boards included on the fence.
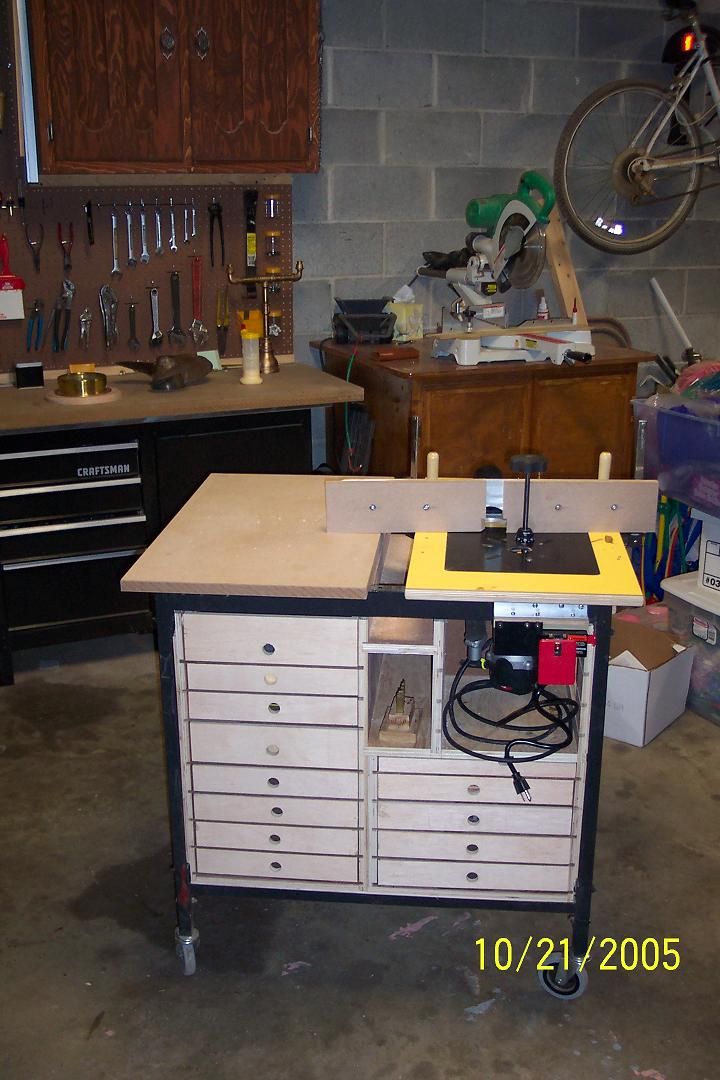
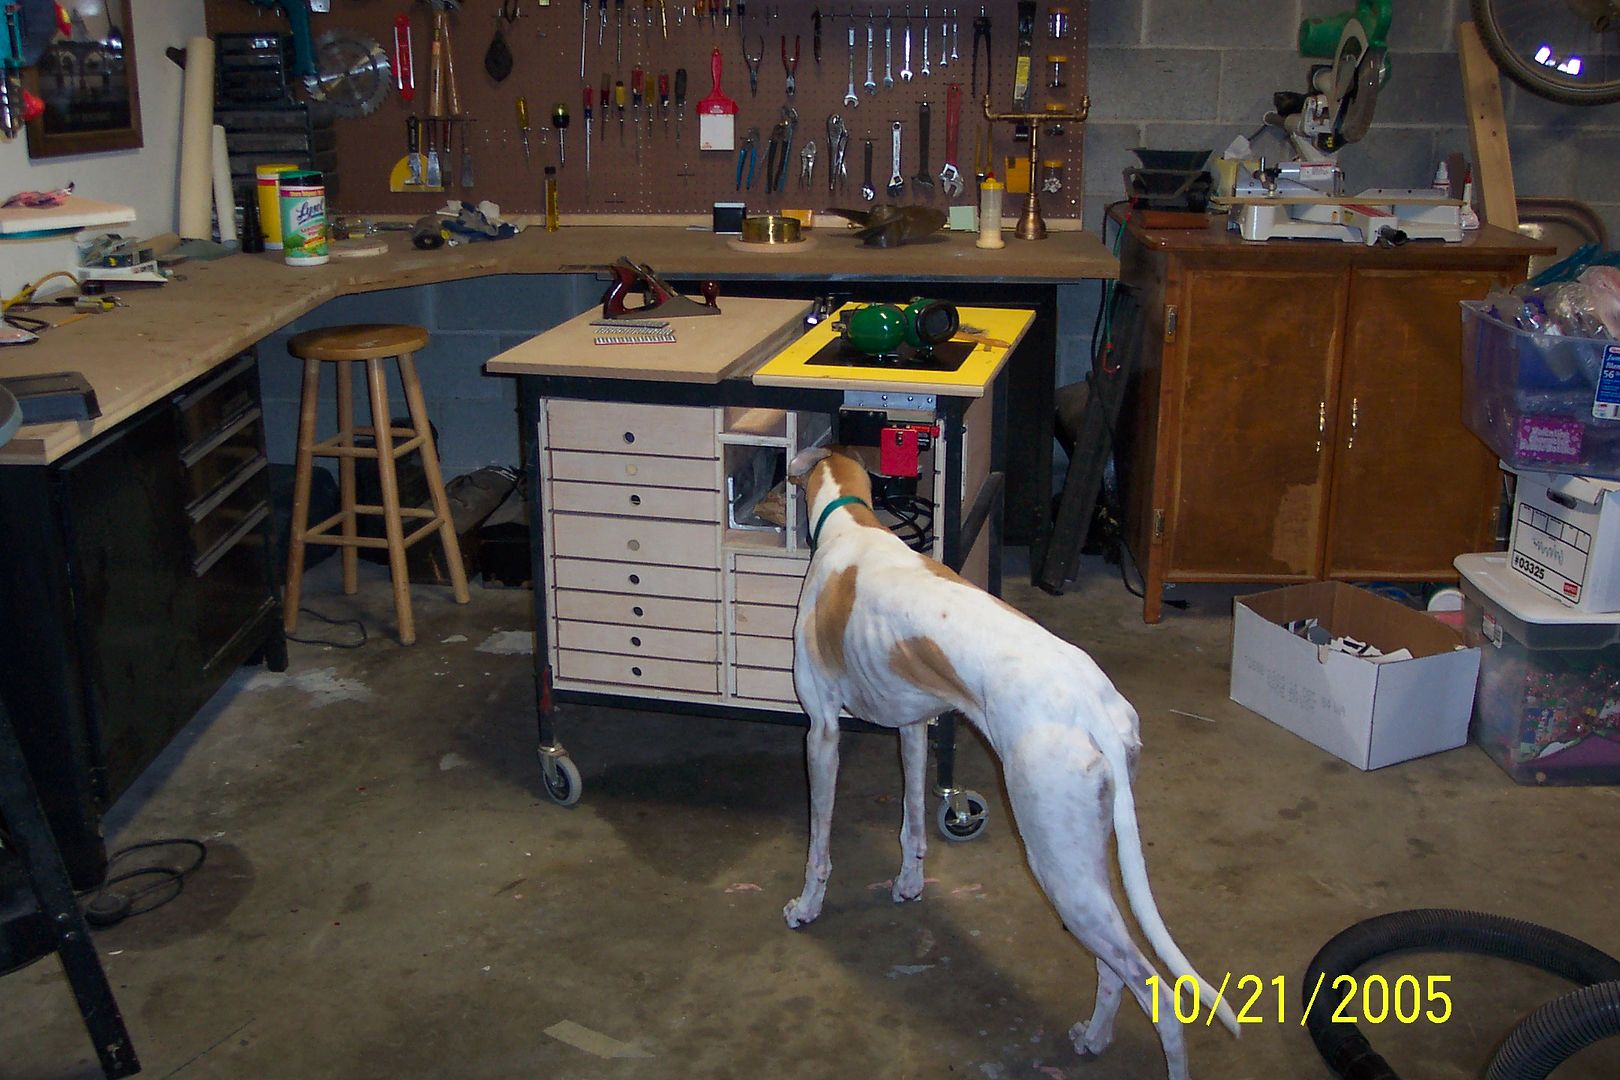
Doug in Fredericksburg, VADoug sent over these pictures. His dog seems to approve. Doug also reminded me of the Router Workshop show on PBS. These guys make some incredible stuff. He also recommends RouterForums.com for answers to just about any router questions you might have. Doug also has a handy tip along with the description of his router table:
One of my favorite tips for the router table is never sweep away debris with your hands... always use a broom. Cutters can be quite sharp if you catch them with your hand, and that aint second hand information. (Notice the broom on the table.)
This table top was the Oak Park design used in the Router Workshop TV series on PBS. The cabinet is built out of luan plywood in a rolling cart frame I found at a store that was going out of business. It stores EVERYTHING, and weighs a ton so the table is quite stable even without locking the casters. The shelves slide out either side, and the only drawer slide hardware is the 1/4 inch hardboard bottom in a dado in the plywood. With a little wax they work surprisingly well, but they do get a little sticky in the humid summer. The big drawer on the top is the router bit storage. I have the bottom of the box lined with a 3/4 inch piece of MDF drilled with a grid of 1/4 and 1/2 inch holes.
The lower drawers on the bottom are perfect for extra bandsaw and tablesaw blades.
The fence is a piece of 4 inch aluminum angle iron milled to a perfect 90 degrees.
Here is my workbench I made a couple of years ago. You can see the bench during construction at: http://lumberjocks.com/Billboard/projects/page/3 Its made from Home Depot 4x4 posts for the legs, 2x6 top covered in MDF and hardboard. 2x6 skirt around it. Lots of bench dog holes. Cost $100 for the bench and $125 later for the 2 vises. Heavy, sturdy flat and does the job. Every few months I scrape the drips on the top, light sand it and apply a couple coats of poly. I added a shelf and a drawer underneath.
*******
Chris Askwith
My main workbench is made using a crockery display stand I salvaged from a shop that was closing, I added some extra screws and struts to make it stronger and more sturdy, the height of it nice as I am a taller person and I can stand comfortable at. Originally it was full length across the top but I recently bought a new band saw and the only place to put it at the correct height was to chop off half the top and mount it on the lower shelf.
The main use for this bench as you can see is to keep the tools I need for my lathe close to hand. The rest of the top is almost level with the table of the bandsaw so it provides a handy support when cutting longer stock. The lower shelf is used for storing logs of English bog oak that I use in the production of pipes. The bench serves me well and cost nothing but a few screws and off cuts to “beef” it up.
I have also included pictures of another little work area I made. With space being at a premium the area in front of the door is very valuable, but of course I need to be able to access it easily. So I built this fold down worktop, it is set at the correct height so I can sit at it comfortably and use it for a lot of hand work and fine detail work. It is surprisingly sturdy and sees daily use. Again it was made of scraps and offcuts and cost me only a set of hinges.
*******
Derek McCrone
This is the first project I ever made. I decided I was an adult now and asked my parents for some power tools for Christmas so I could get into wood working. Once I got them I realized I needed a work bench, so I set out to make one!
This is the result. Its just made from 2x4s with a plywood top, but I think it turned out pretty good.
******* Michael Borg
The wooden crate with the MDF top is my work bench. Just the right size.
*******
Dwayne Bowyer
Well, Dwayne wins the award for the best makeshift, dual-function bench! Ha!
Stuart posted a comment in yesterdays comments cluing me into something I wasnt aware of regarding router bits. A problem with many bits and routers is that the shaft of the bit can be longer than your collet. In this case, if you drop the bit all the way down into your router, it may bottom out, causing the bit to slip. Clearly, a rubber o-ring trick will do nothing for you. Tim sent me a diagram illustrating the opposite end of the router shaft: where it meets the cutting part:
You can see where that taper occurs. Thats the area that I think Woodsmith was addressing. All in all, I think the best and easiest tip is to just drop your bit into the router and back it out a slight -ahem- bit. **** No project video to post this week guys. Sorry. Somehow summer activities tend to keep me out of my shop more than usual. Heres an update: Mere Minutes
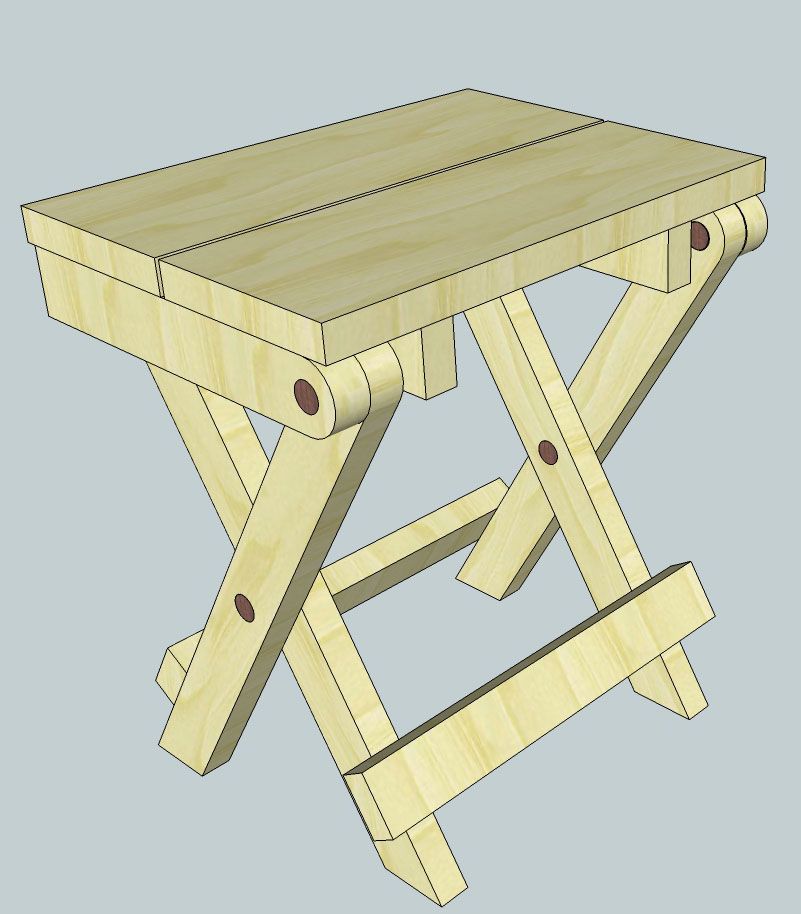
I am finally motivated enough to get myself back in front of the bench and actually build something - about freaking time! As you (regular readers) may well know, one of my 2012 resolutions was to sell some of the things I make. Well this has been achieved by selling my Rustic Stool and has given me incentive to make a few more to sell. Mainly, to recoup some of the money I have tied up in timber.
The session began by discovering my bench top was no longer flat, maybe due to the arrival of Spring and the warm weather we have been having lately or my bench repairs I did a short while ago? Either way, before anything else could happen it was time to warm up with my trusty no#6 foreplane and a straight edge.
Once the top was vaguely flat, I also remembered I had yet to re-drill the dog holes to make the bench usable. A few minutes later I was ready to finally begin work ... no I wasnt. As I havent been doing much wood work lately, I knew things would need a bit of a sharpen. My first tasks would be dimensioning the leg stock and processing the rough cut seat tops.
Two large chisels, my marking knife and the no#6 plane blade, all sharp and ready to go...
I had previously rough cut four pieces of stock from one of my scaffold boards to make four stool seats, one small, two mid size and one slightly longer - all the same scaffold board width. I also had twelve meters of 2"x2" Pine leg stock.
Work began by planing the seat tops to remove all the rough saw marks to make marking out easier and basically get them flat. First across the boards, then diagonally and finally with the grain. This process allowed me to familiarise myself with the directions of grain flow and mark the boards where it changed direction etc.
The next step was to use a straight edge and get one of the long sides straight, followed by making the opposite side both straight and parallel. Luckily the boards werent to bad and this went quite smoothly.
To be honest, I know from previous experience that the stools joinery is not too dependant on the seat tops being perfectly flat and square so I wasnt to obsessed with getting them perfect - its a rustic stool after all!
I did notice that the two medium size seat pieces were showing signs of cracking in the end grain, obviously from drying out to quickly. I decided to leave them alone to see how they develop over the next few days and only build two stools - a larger and a small one.
The last step was cutting both ends of the board to get them square with nicely finished end grain using my trusty large tenon saw.
A short while later I had two seat tops ready for joinery. I hadnt smoothed them as this can be done later.
Time to dimension some leg stock...
I decided from my previous stool and the difficulty in finding a suitable size box to post it in, that both stools would have the same size legs, at least to begin with. I am not building from plans so this may change on down the line according to the look of each stool. The main thing is I know both will fit in my planned postage boxes.
Standard procedure, mark all four sides with the knife, pare out the cut line with a chisel and then cut squarely on the bench hook using my Carcass saw. I had to cut around the unusable knotty bits.
I love my Lie Nielsen saws, they are such a joy to use! Im not sure if its because I havent done anything for a while but my sawing is more accurate then ever! It maybe (and probably is) due to my new adjustable square being more accurate than my larger more cumbersome cheap combination square?
Anyway, there we go ... Two seats and eight legs. The sun is out so thats enough for today, time to go and plant out some carrots in the sunshine.
Big thanks to Bruce (AKA Wood Chuck) for taking the time to design another version of the folding stool. This one is in Google SketchUp. Ive also created a PDF of all 6 pages of views, if you would prefer that. So heres a bunch of options:
Bruces Sketchup file
PDF version of Bruces design
PDF of Tim Barkers very detailed AutoCAD design
Give this a shot. Its a great project! ***** Mere Minutes
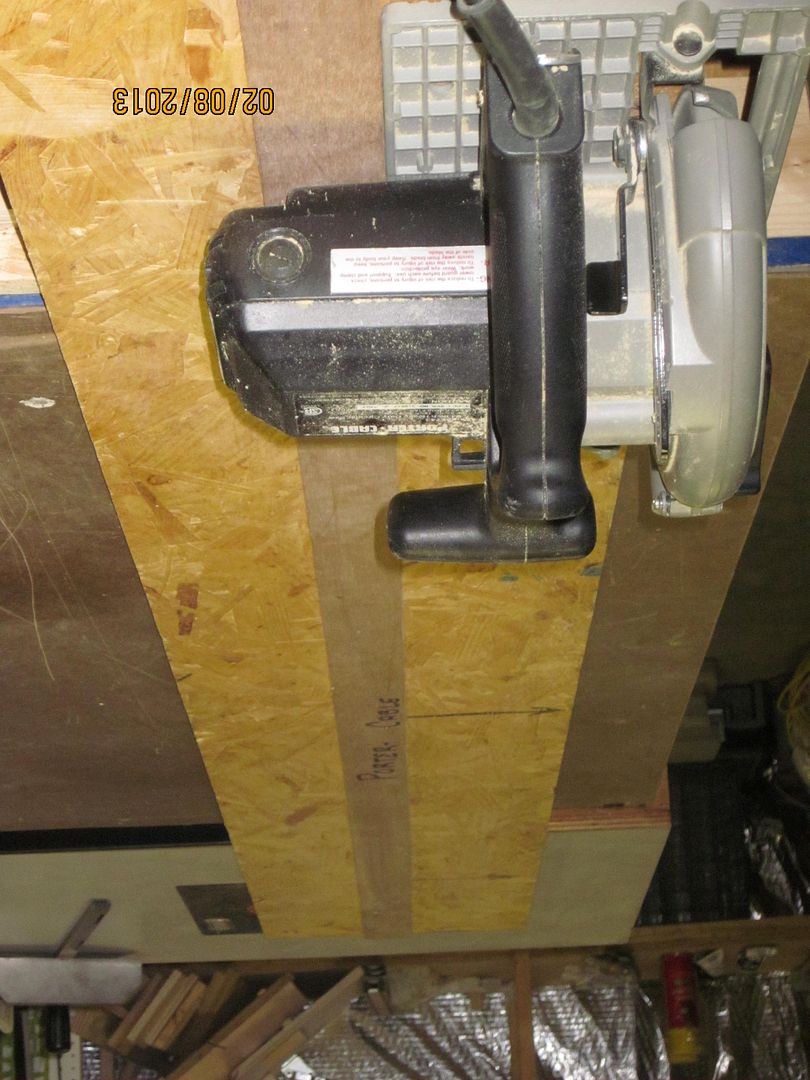
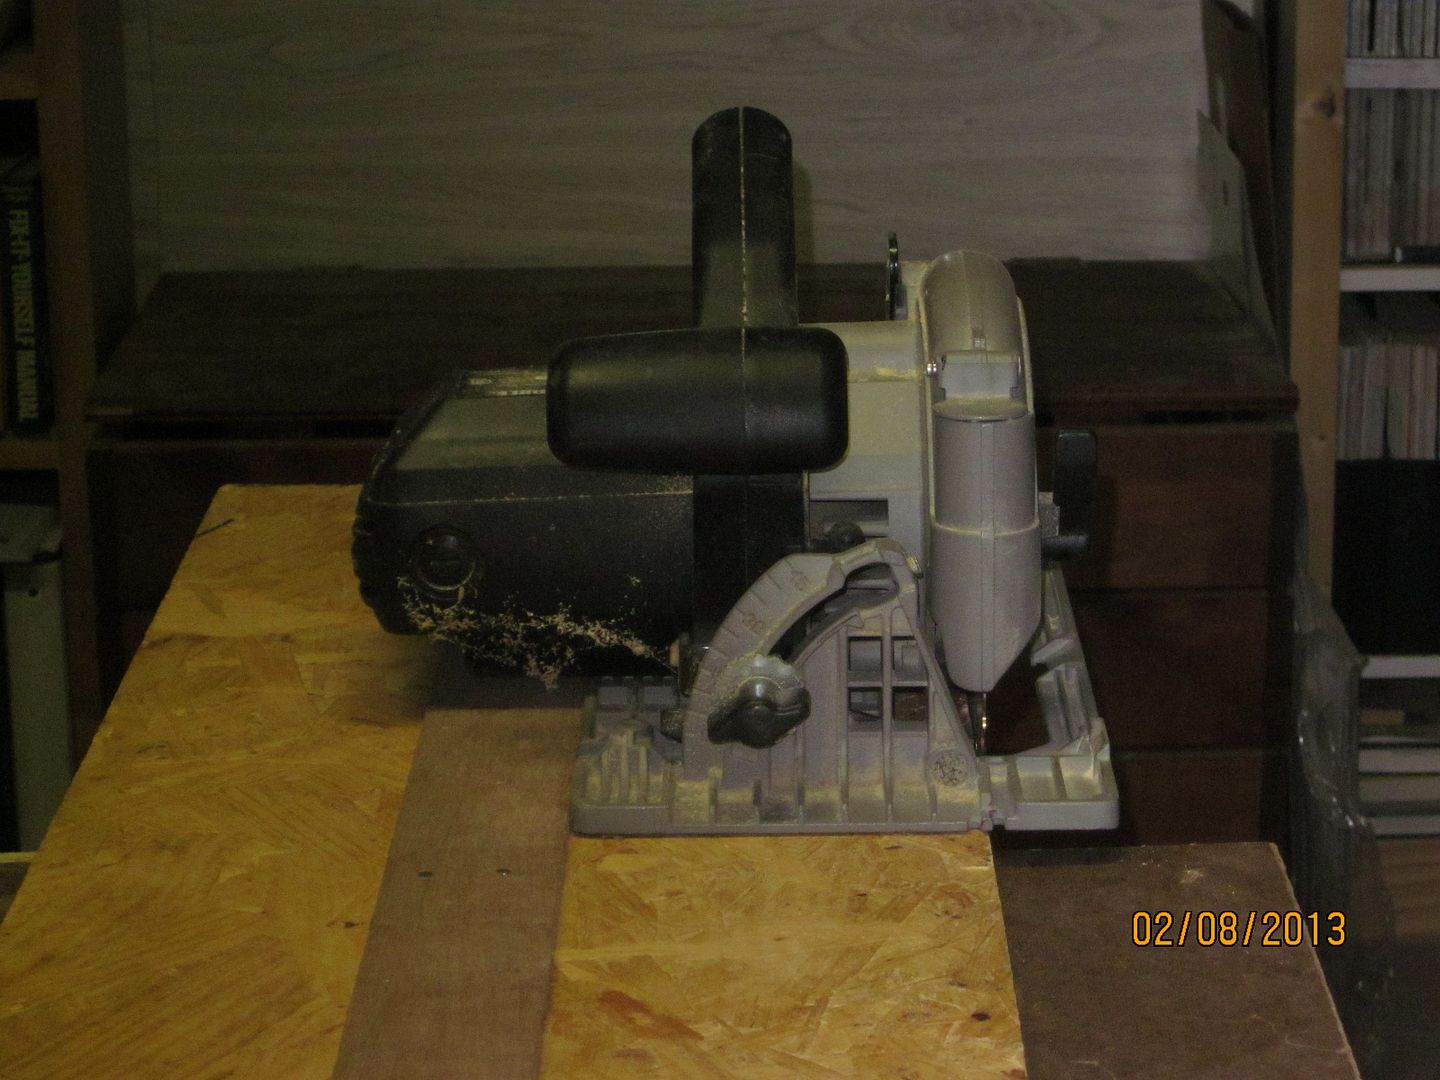
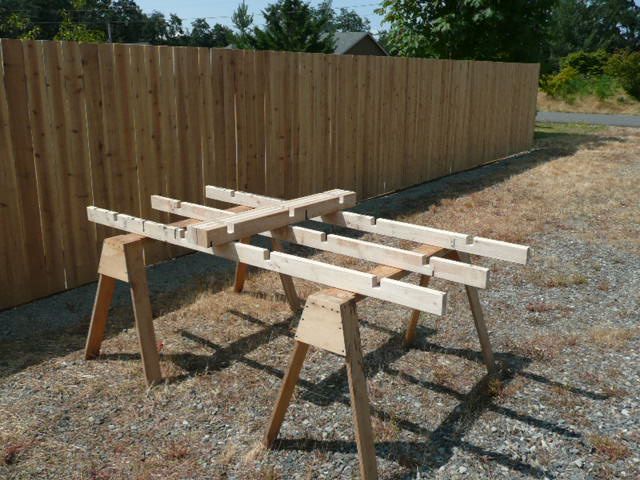
After Last weeks sheet goods cutting video, I had a few people send me their methods for breaking down plywood. A few people mentioned making one of these long boards with a built-in "fence" to ensure accurate cuts every time. Here is Ted Sobocienskis version.
*****
Jerry Ormes has the same idea, but also sent over a Sketchup file for you do download.
*****
I really like David Higgins system and may make one myself.
"I made this system for beaking down sheet good, you just set up on saw horses. The grid system allows you to cross cut or rip cut, and your work will always be supported, also the system breaks down and leans against a wall when not in use. One other feature is you through a sheet of ply on top, and you have a great work surface."
My workbench is quite old - at least 40 years. I got it from my uncle, who used to do some woodworking/carpentry in the past. Since I have this workbench, my woodworking became a lot more efficient and is giving me more fun, because I dont have to worry about good support for my workpiece.Its made of beech, the length is approx. 240 cm (95 inches) and its really heavy, the top is about 4 inches thick. It has two vices that are very comfortable. It also has two big drawers and on the back of the top there is place for tools.
Despite its age, its still very stable and sturdy. Twice a year I clean the top with random orbit sander and put some oil on it.******* Warren DownesHere is a nice little workbench i made for my Father in law, i used threaded rod to hold it together no glue or nails for the frame, the frame is unbelievably strong you can jump on it (i did) and there is no movement.
The top is 2 layers of 19mm MDF glued and screwed together, i have an overhang on one side to mount a vice on, and holes for bench dogs.
I used a router to make a groove that the rod sits in for the rails and drilled holes with a 35mm forstner bit in the posts about 20mm deep for the washer an bolt and 10mm threaded rod through the post.I think a drill press is needed as the holes going through the posts need to be a perfect 90 degrees for an exact fit.
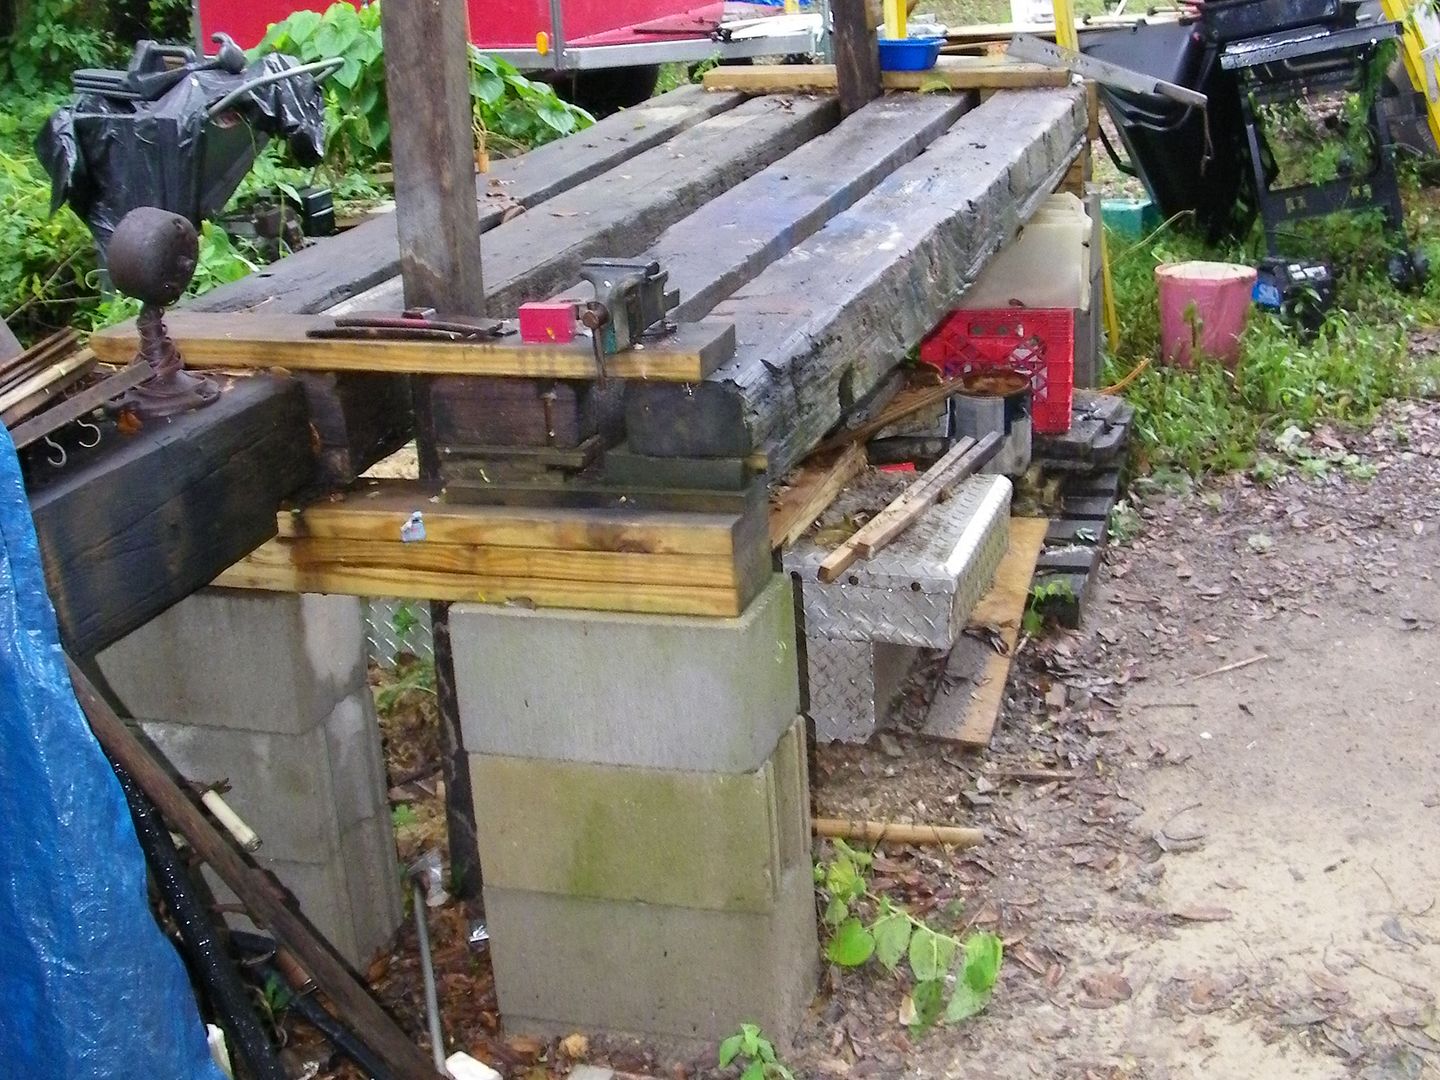
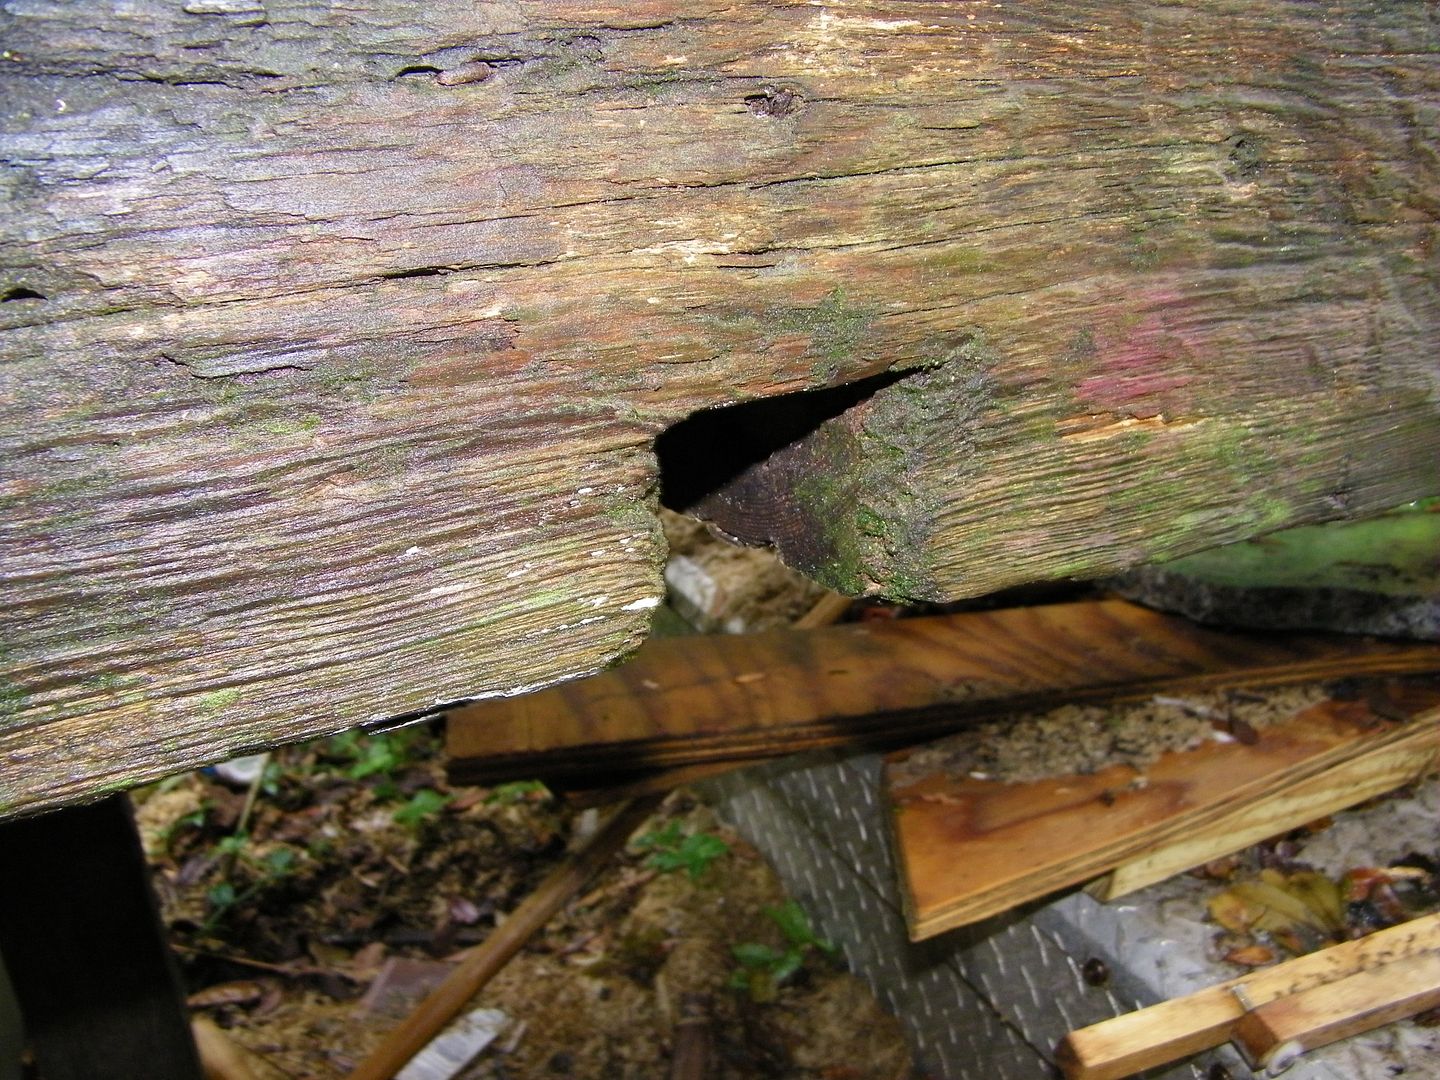
Its around 5ft x 2ft but you could do any size you want, i think its well suited to a smaller movable work bench. Maybe next time some shelves and enclosing the base would be a good idea.Its simple, cheap to build and really strong******* George FulfordI thought Id show you the workbench for my meager little shop. Its weather-proof and tough. It is made from heart pine beams, 2x6s and cinder blocks. The beams were from my old house that was torn down due to Hurricane Ivan. They were axe-hewn back in the 20s for an old barn, then salvaged for my old house, now theyre my workbench. I love recycling wood :) If only it hadnt rained today when I took these pics. Oh well.
*******Biff AlexanderHeres my new workbench. Although it wont win a prize for prettiest, it serves its purpose well. The work surface is 35"X92" plus a removable trash can at the end to just swipe trash/junk into when a project is done. I still have to put the plywood on the bottom for a shelf, but other than that, its a 2x4 frame with a 3/4 ply top, and a hardboard/MDF type cover. I only spent $20 building it by mostly using Lowes clearance wood section, haha. I had a 7 bench when I first started woodworking, but there never seemed to be enough surface, so when I moved into the new shop, I figured I would just use that entire back wall for a workbench, considering I have stands for most of my other tools, and an old shopsmith to save space w/ bandsaw/scrollsaw/jointer/belt sander/disc sander.
*******
Johnny DelgadoMy basic workbenches. I made the 3 tables from IKEA parts. Simple but theyve lasted and they work.


 *******


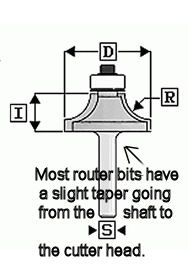 You can see where that taper occurs. Thats the area that I think Woodsmith was addressing.


 *******