Tampilkan postingan dengan label router. Tampilkan semua postingan

Senin, 30 Mei 2016

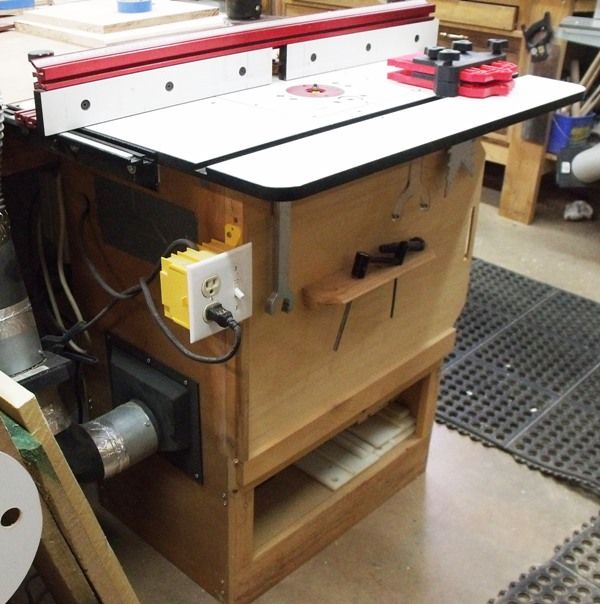
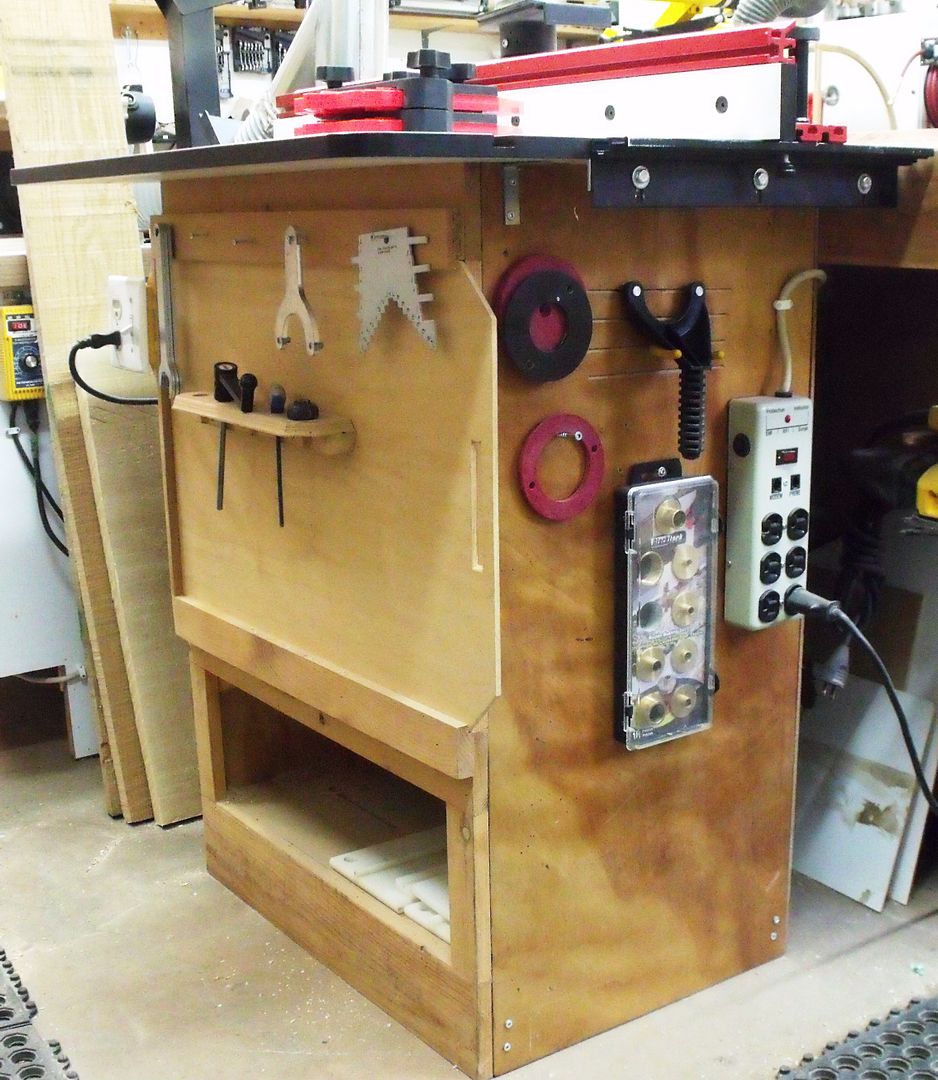
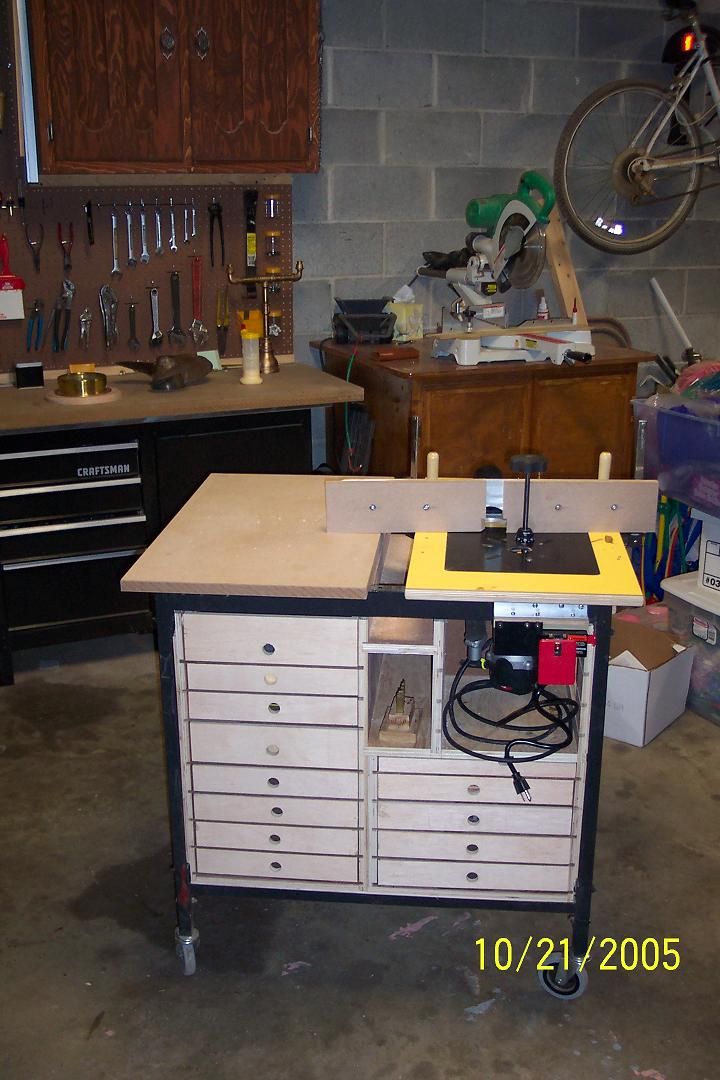
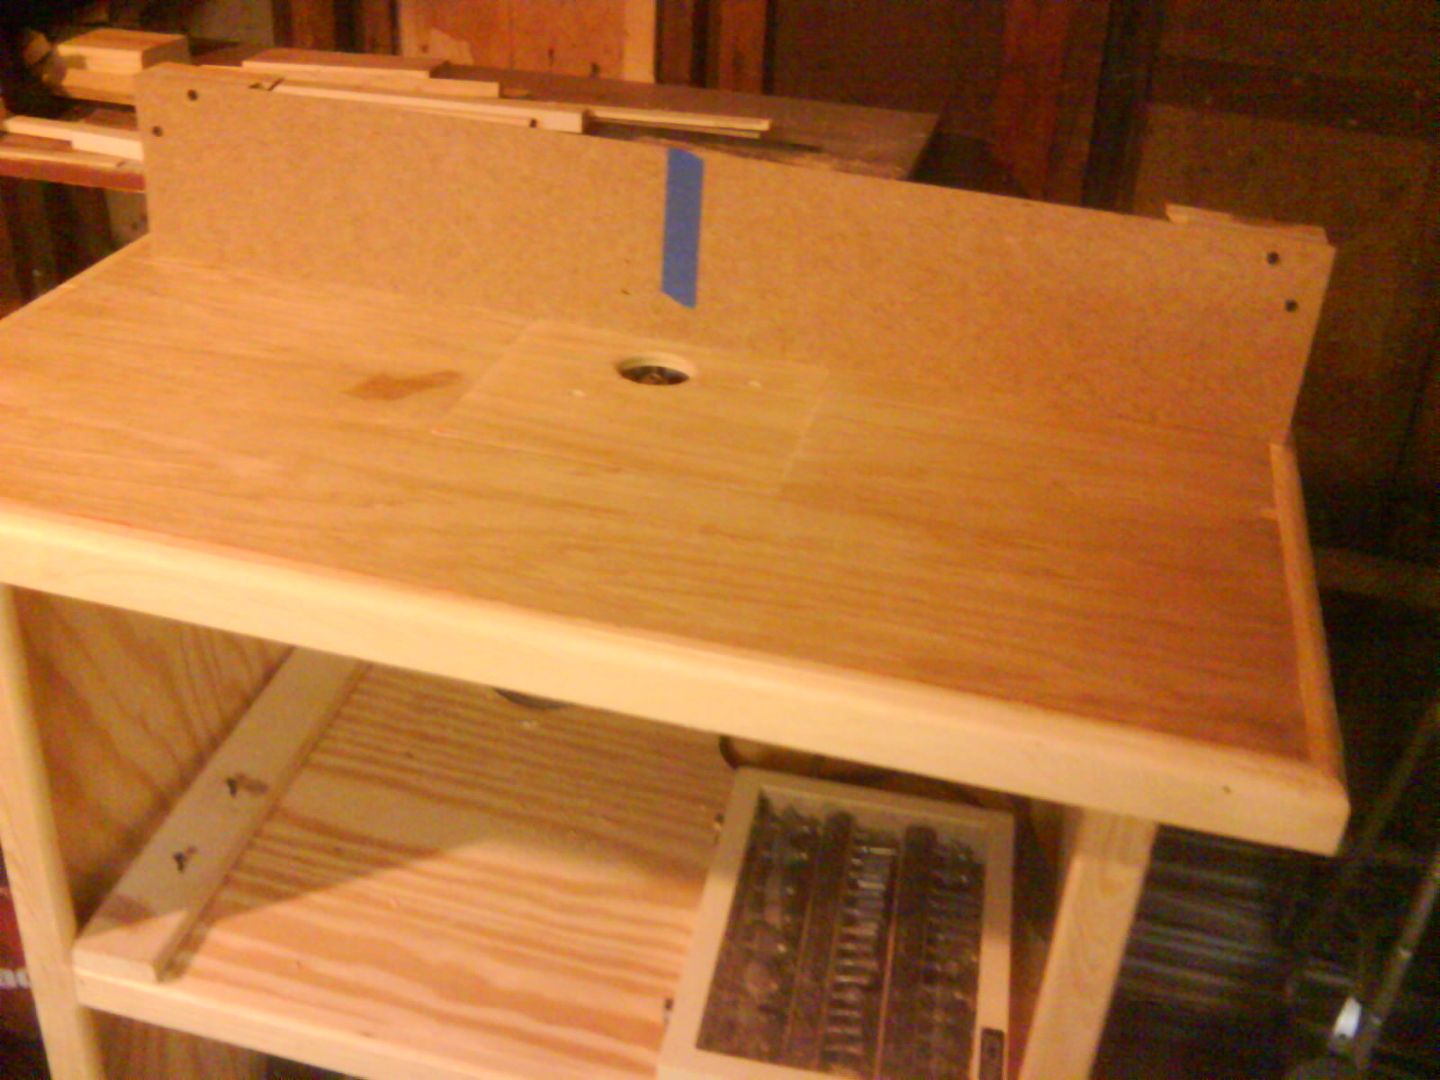
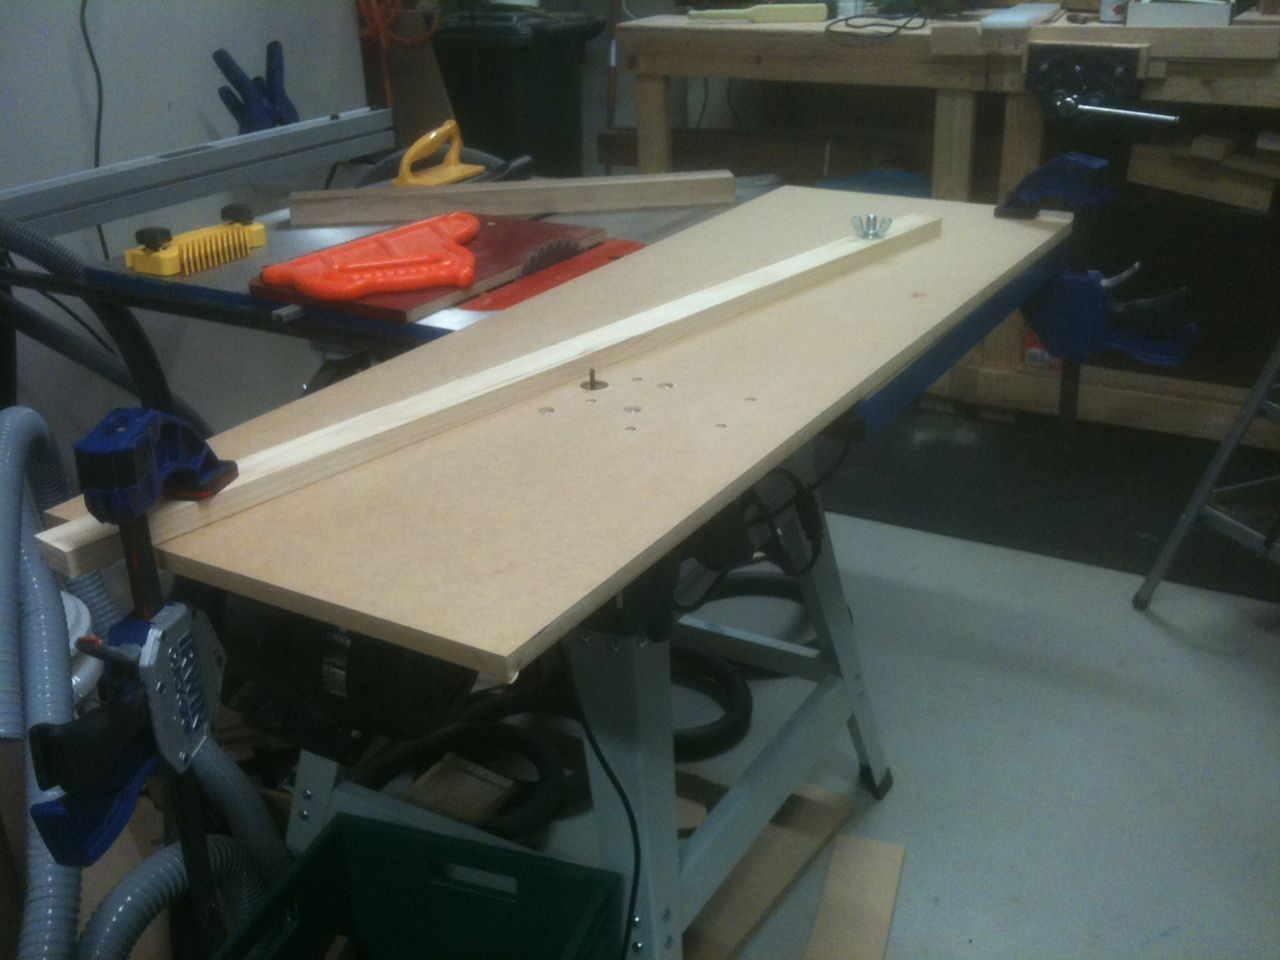
My regular Mere Mortals video will be Sunday this week. So it gave me some time to shoot an update to the router table and lift, now that Ive had over a week to work on it.
Missing an opportunityIve spoken to Shop Notes (August Home Publishing) and they have no desire or interest in offering project plans online. Its kind of odd, but their reasoning is that putting plans online would cheapen them because people would be distributing them willy-nilly all over the place. (I guess people wanting to sell pirated versions havent thought of just scanning the magazine?)
Even stranger is that they have no plans for any online presence for Shop Notes. (Other than the "brochure" that now exists.) You cant even buy the last issue (with the router lift) anywhere. Shop Notes is not even on Facebook! Is it possible for any business to survive without some sort of online component? Especially a business whose sole means of income is printed material through snail mail. Weird.
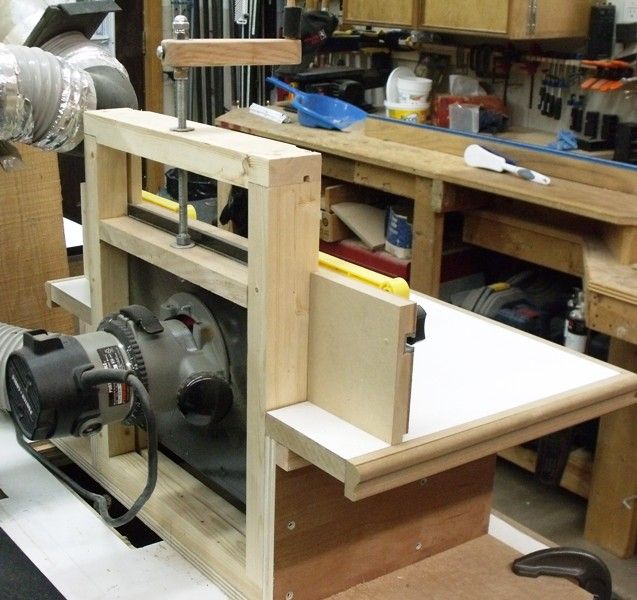
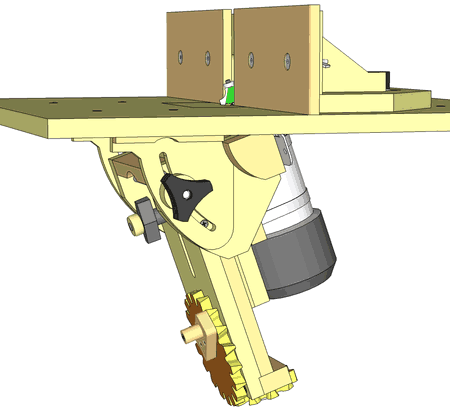
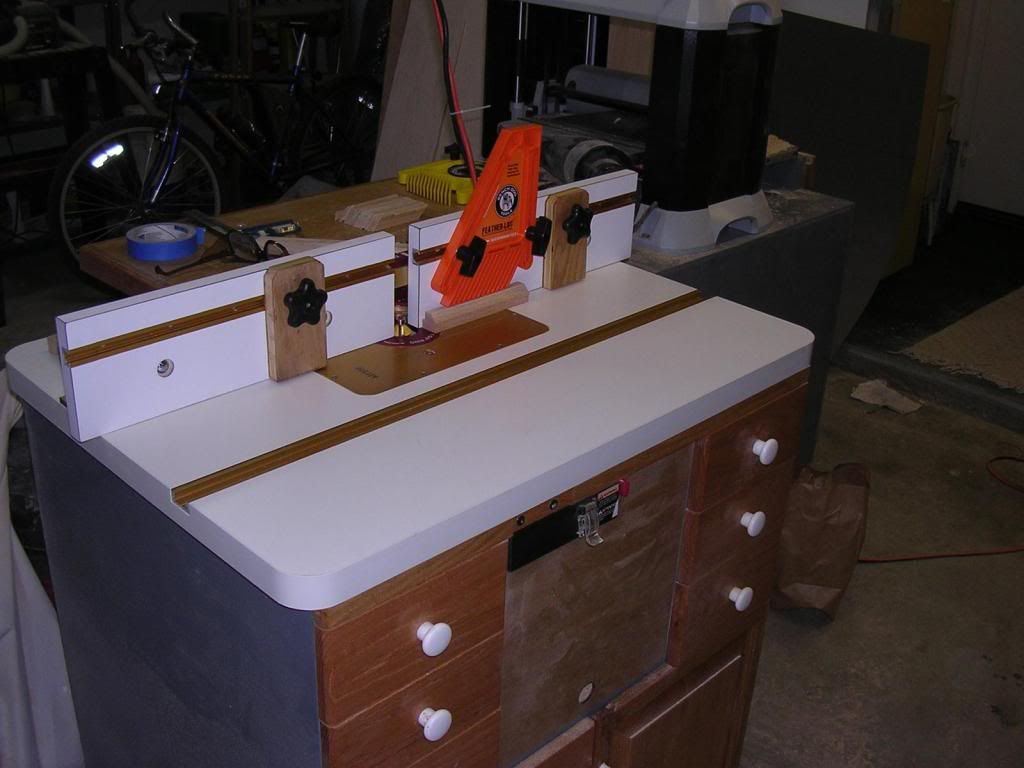
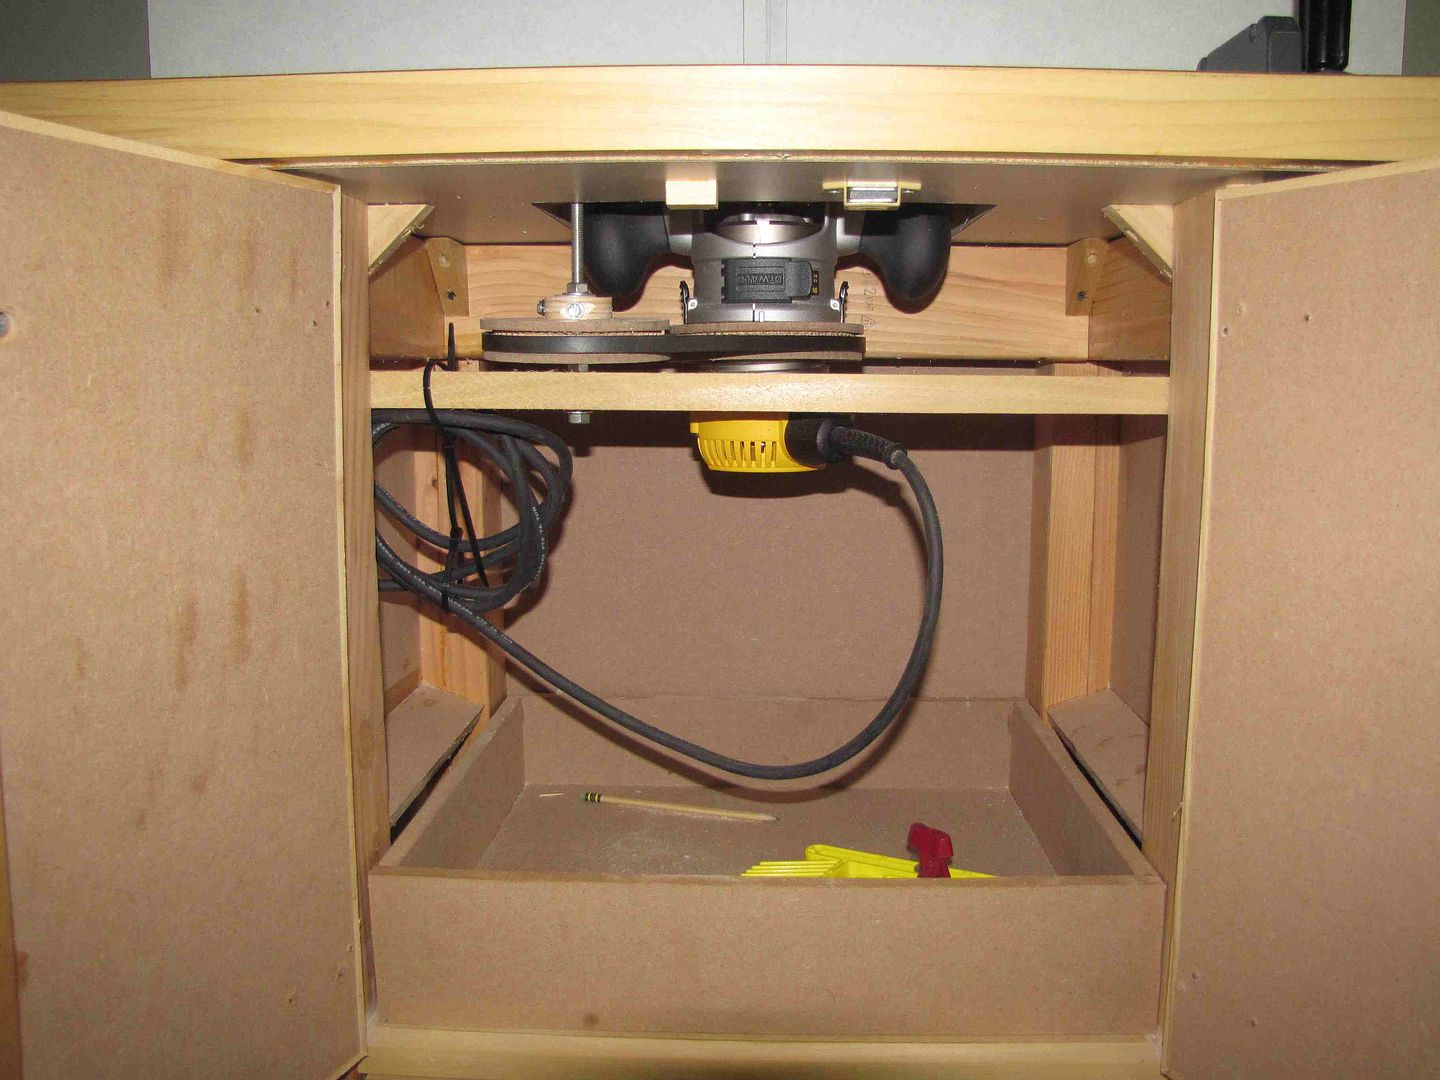
A good router lift drawingAt any rate, Bruce Beatty took the time to design and offer this SketchUp drawing of a router lift that is quite similar to the one I made for my table. If you are interested in making that lift, check it out. If you have these plans and follow along with my video, it should be pretty simple. Thanks a bunch Bruce!
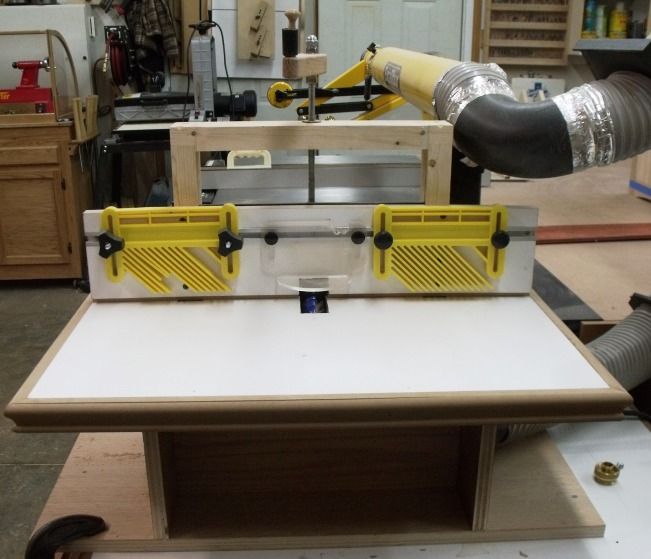
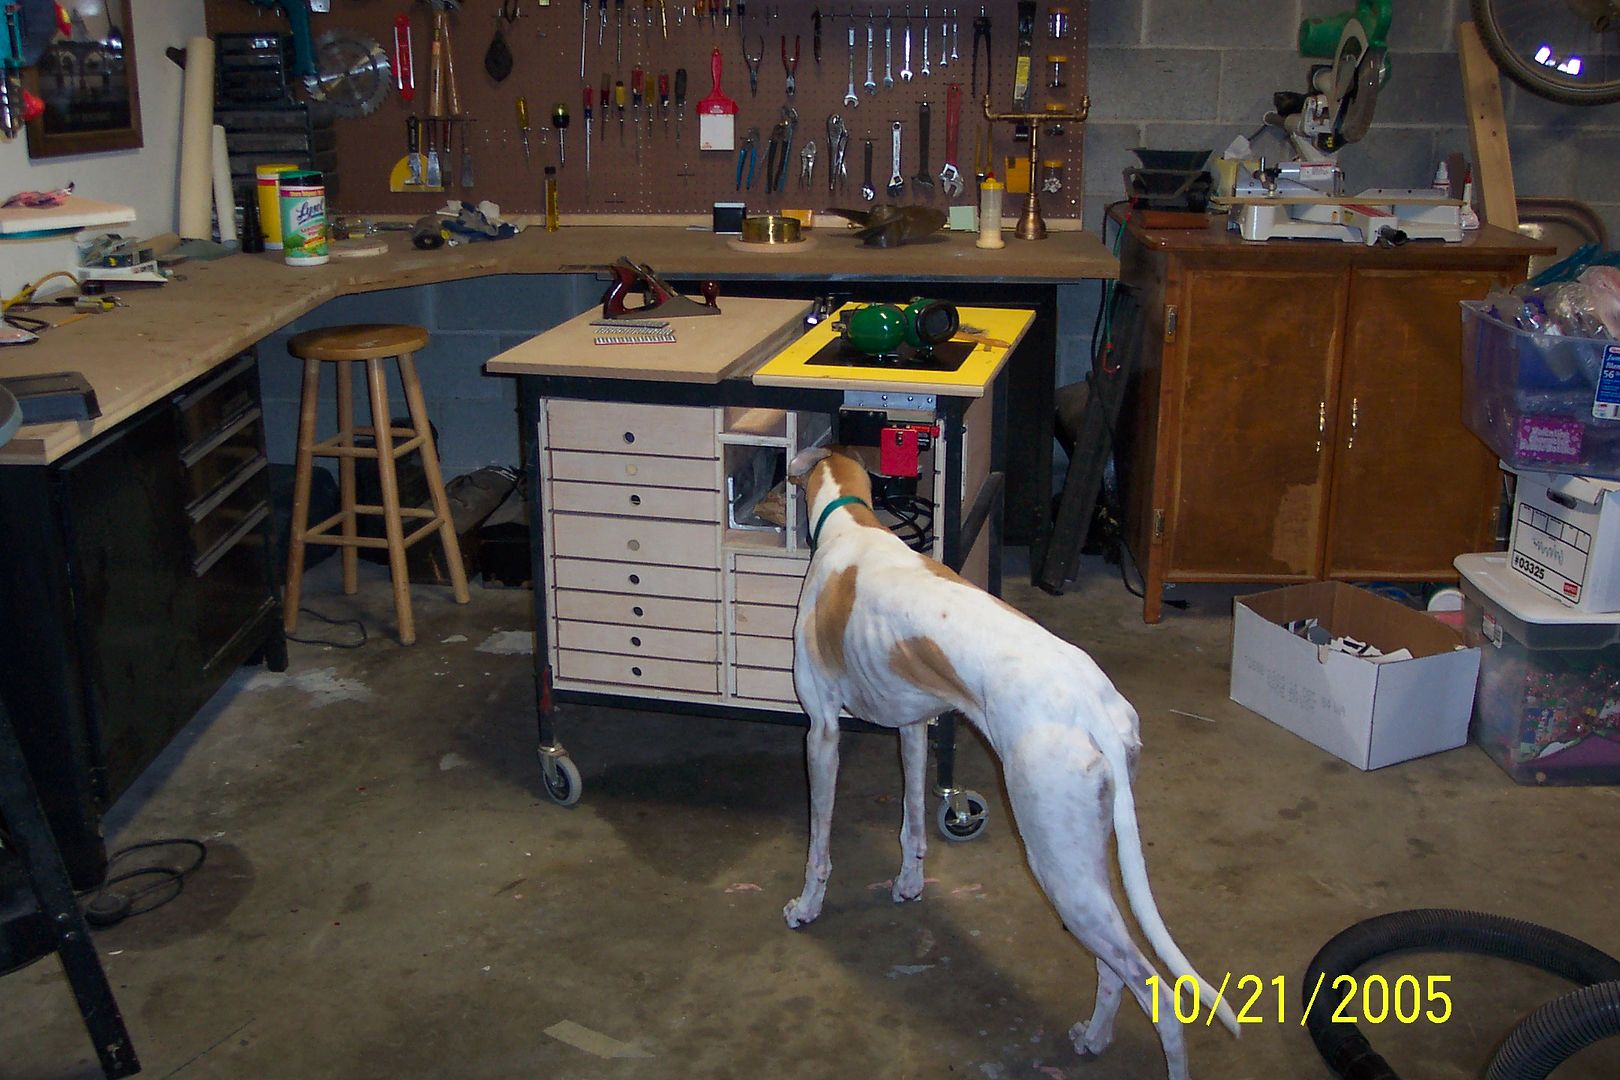
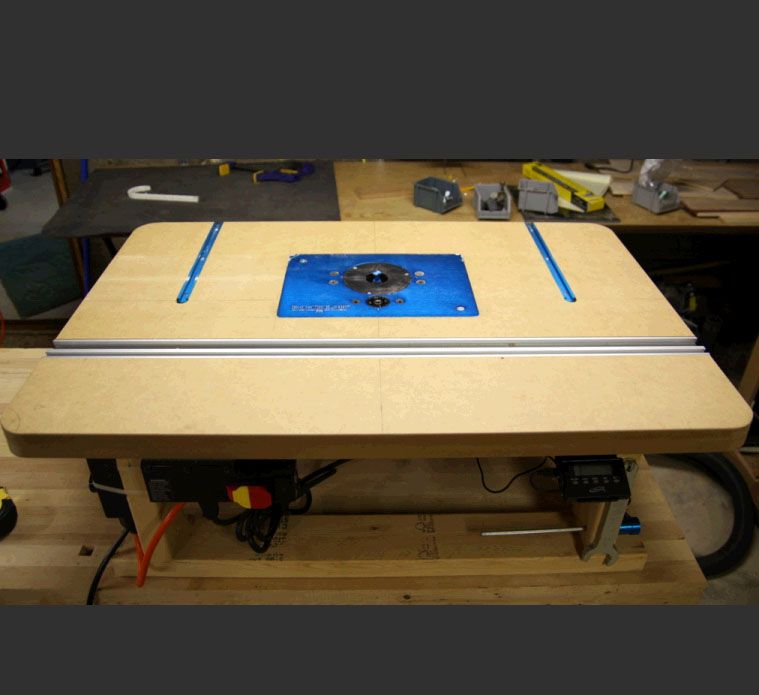
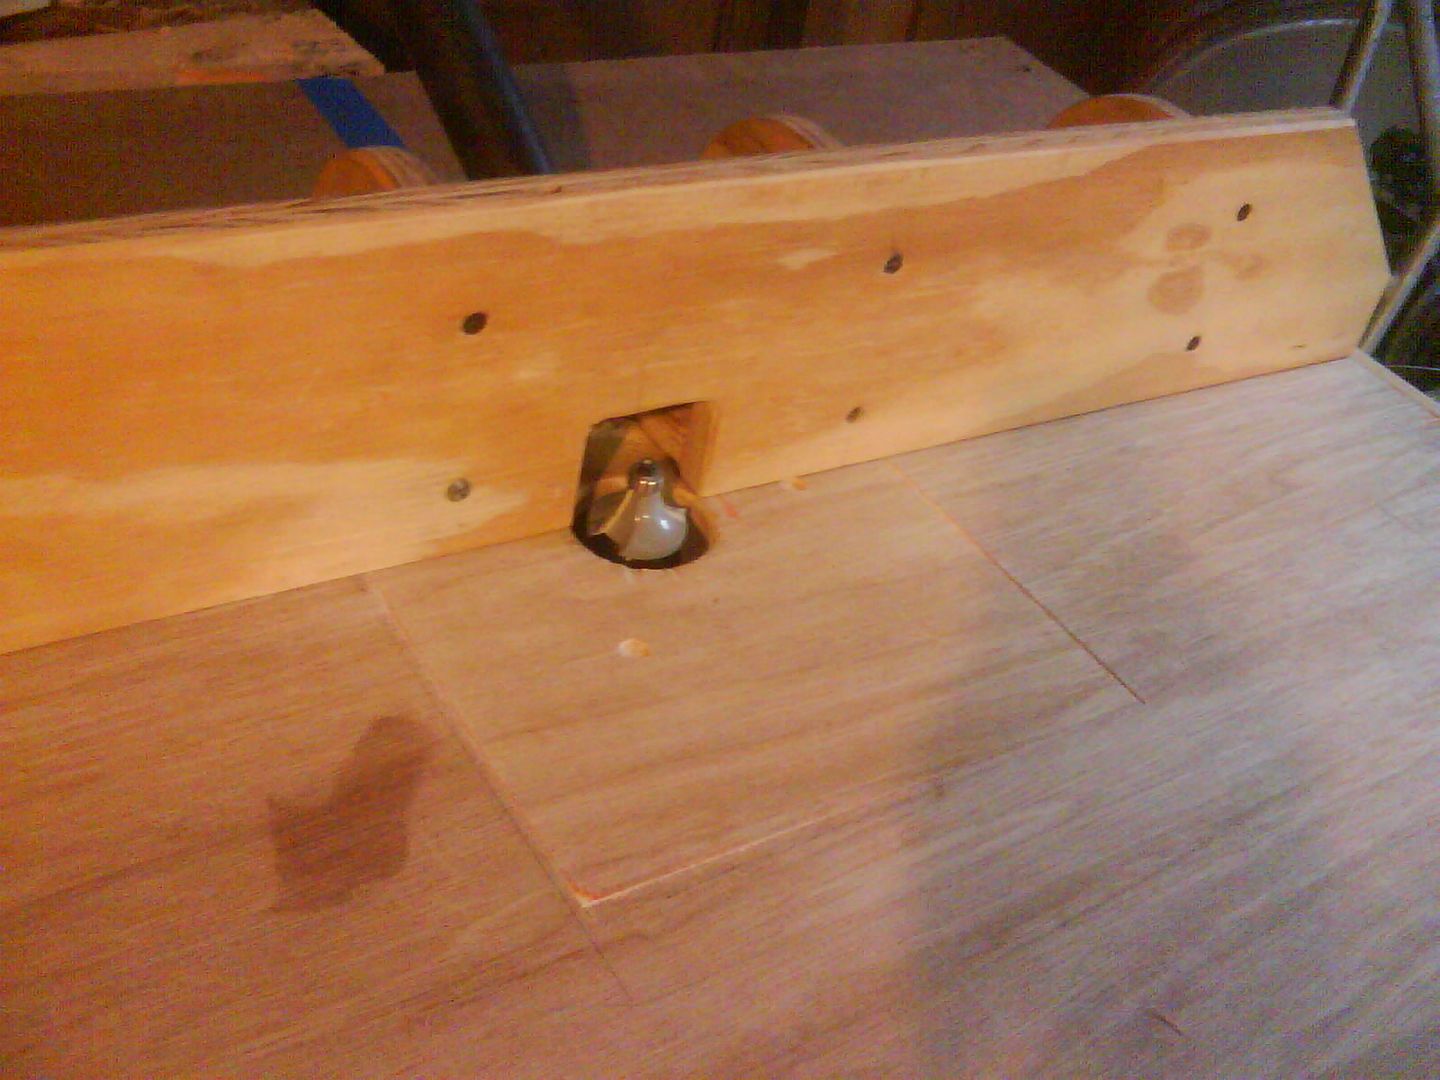
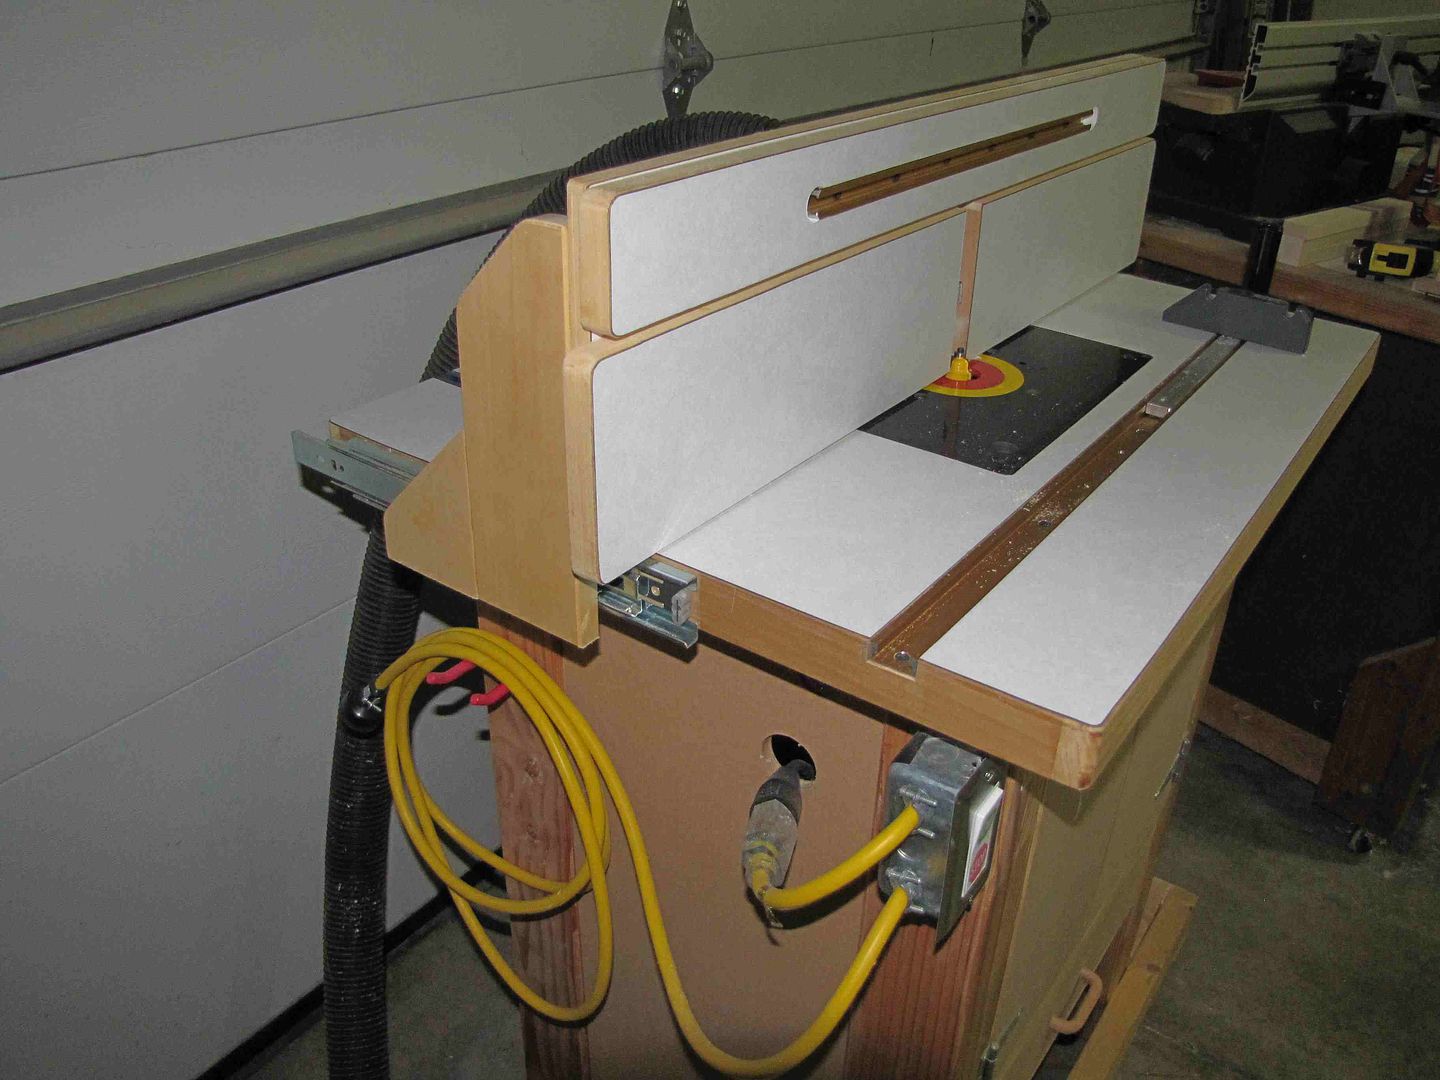
Dust extraction tests
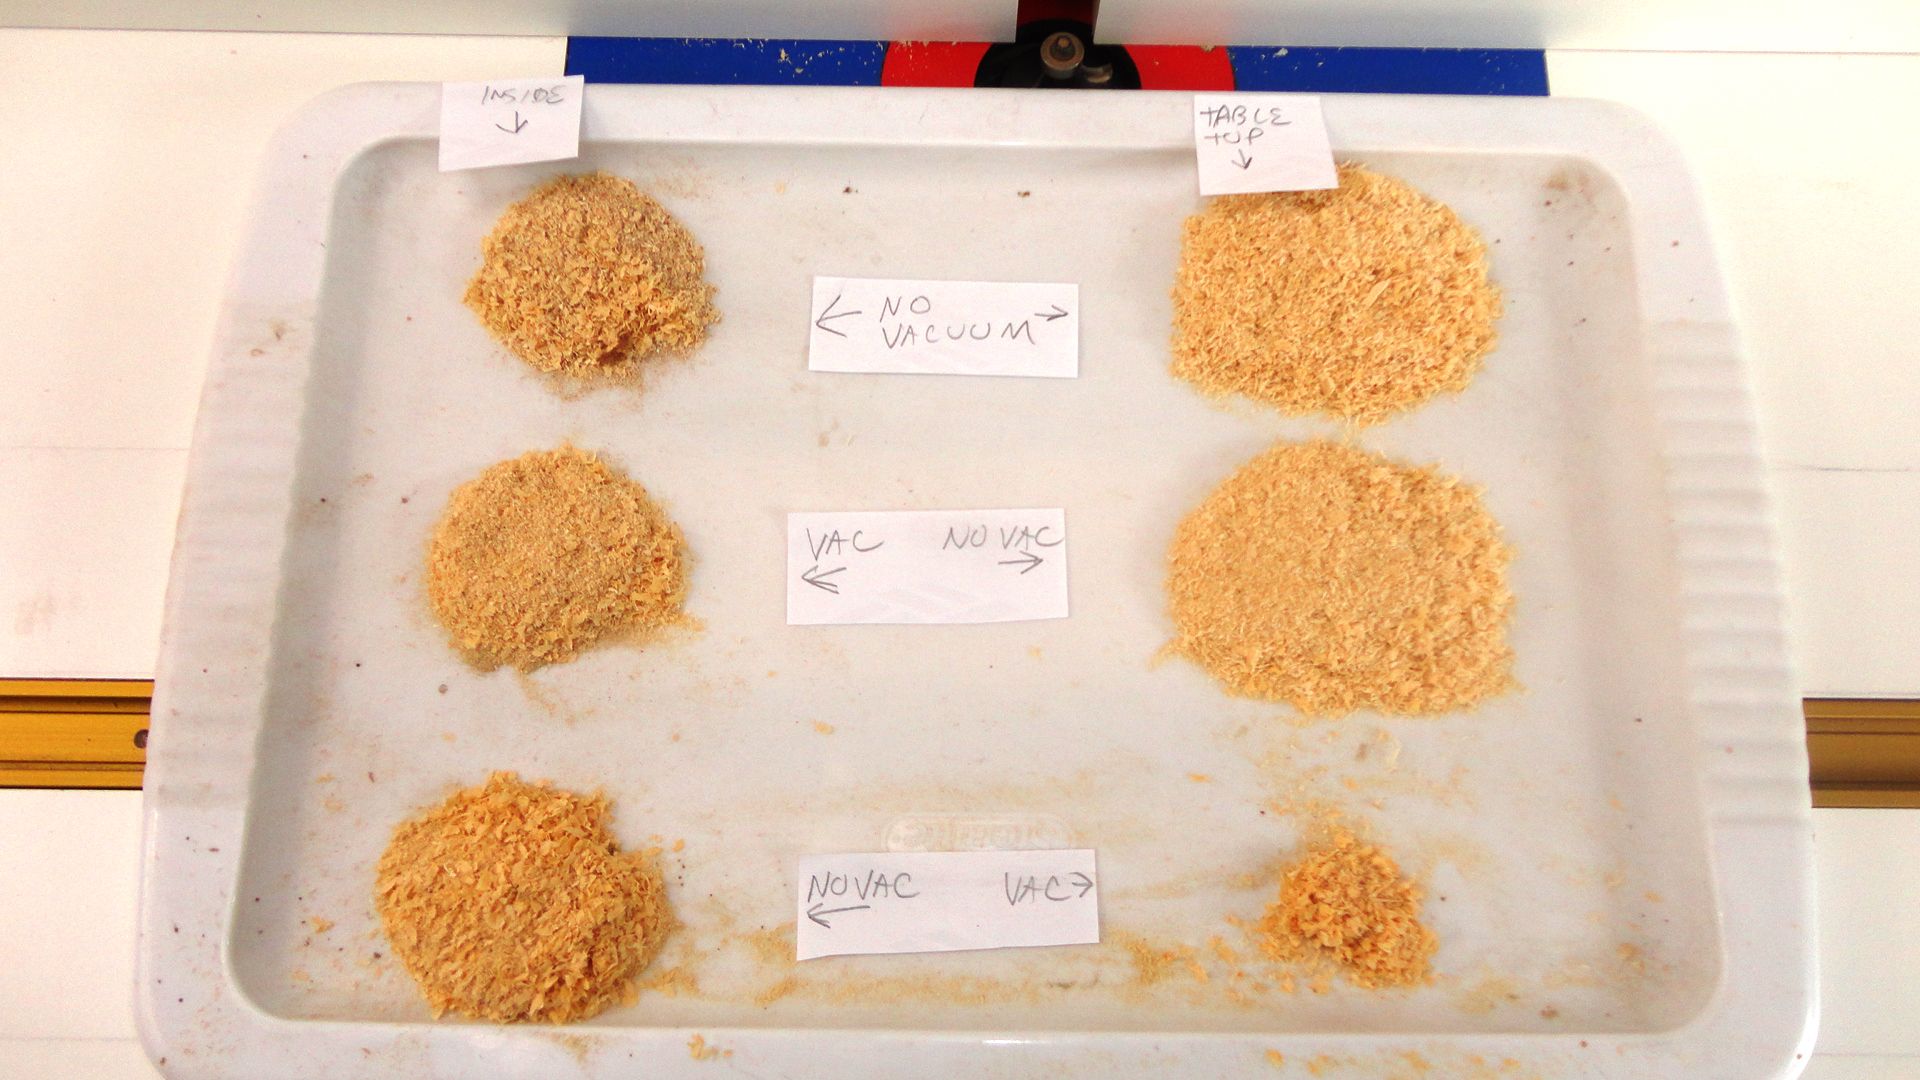
I ran a few very unsophisticated tests on the dust extraction on my router table. (And yes, every time I look at this picture I think of cookies!)
Mainly what I discovered is that most of the sawdust produced by my router lands on top of the table rather than falling below. My conclusion is that having dust extraction on the fence is very useful, but does little in the cabinet.
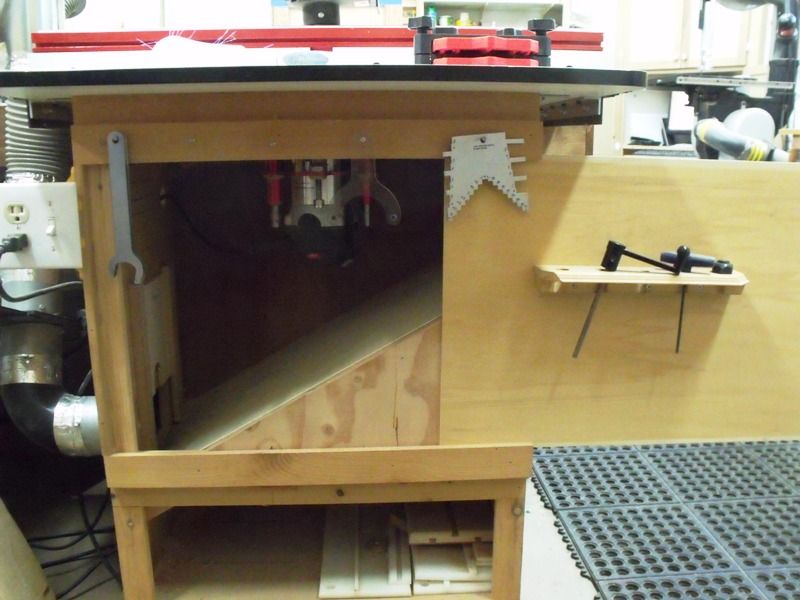
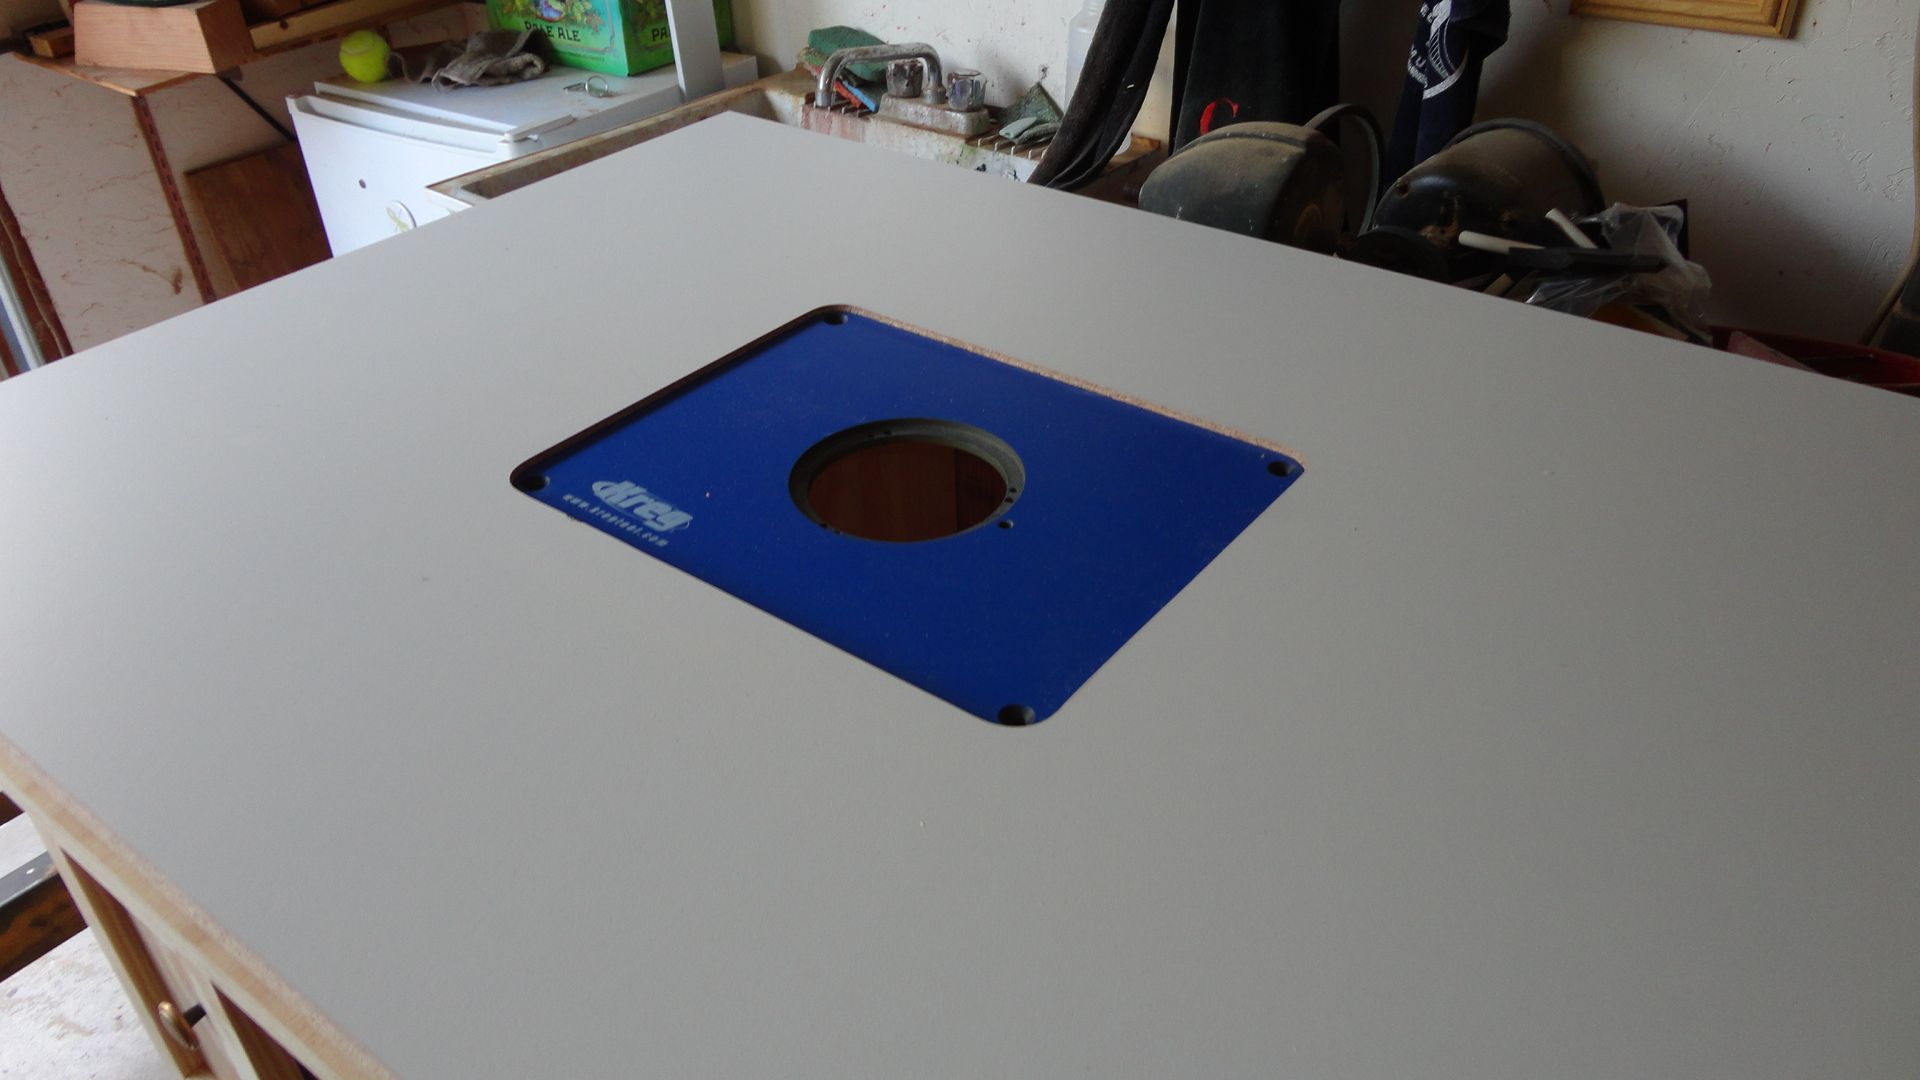
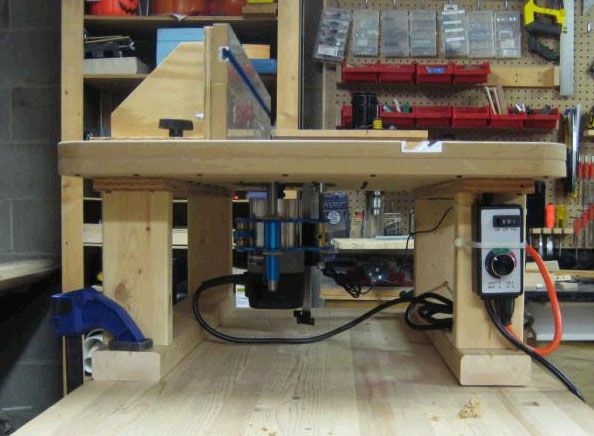
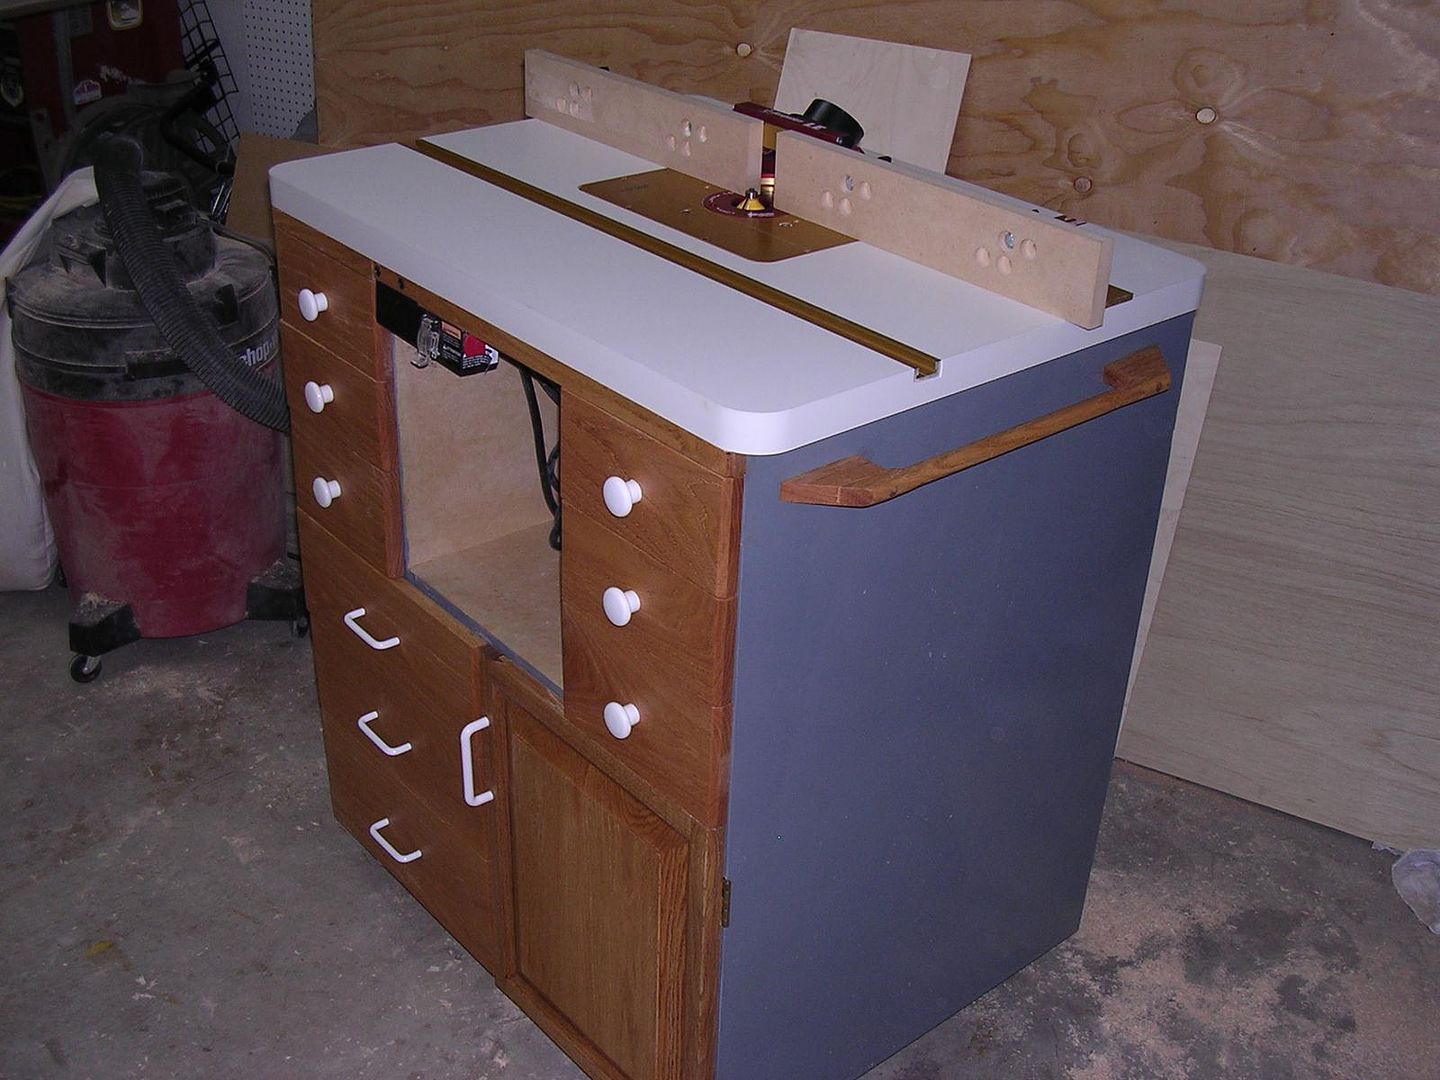
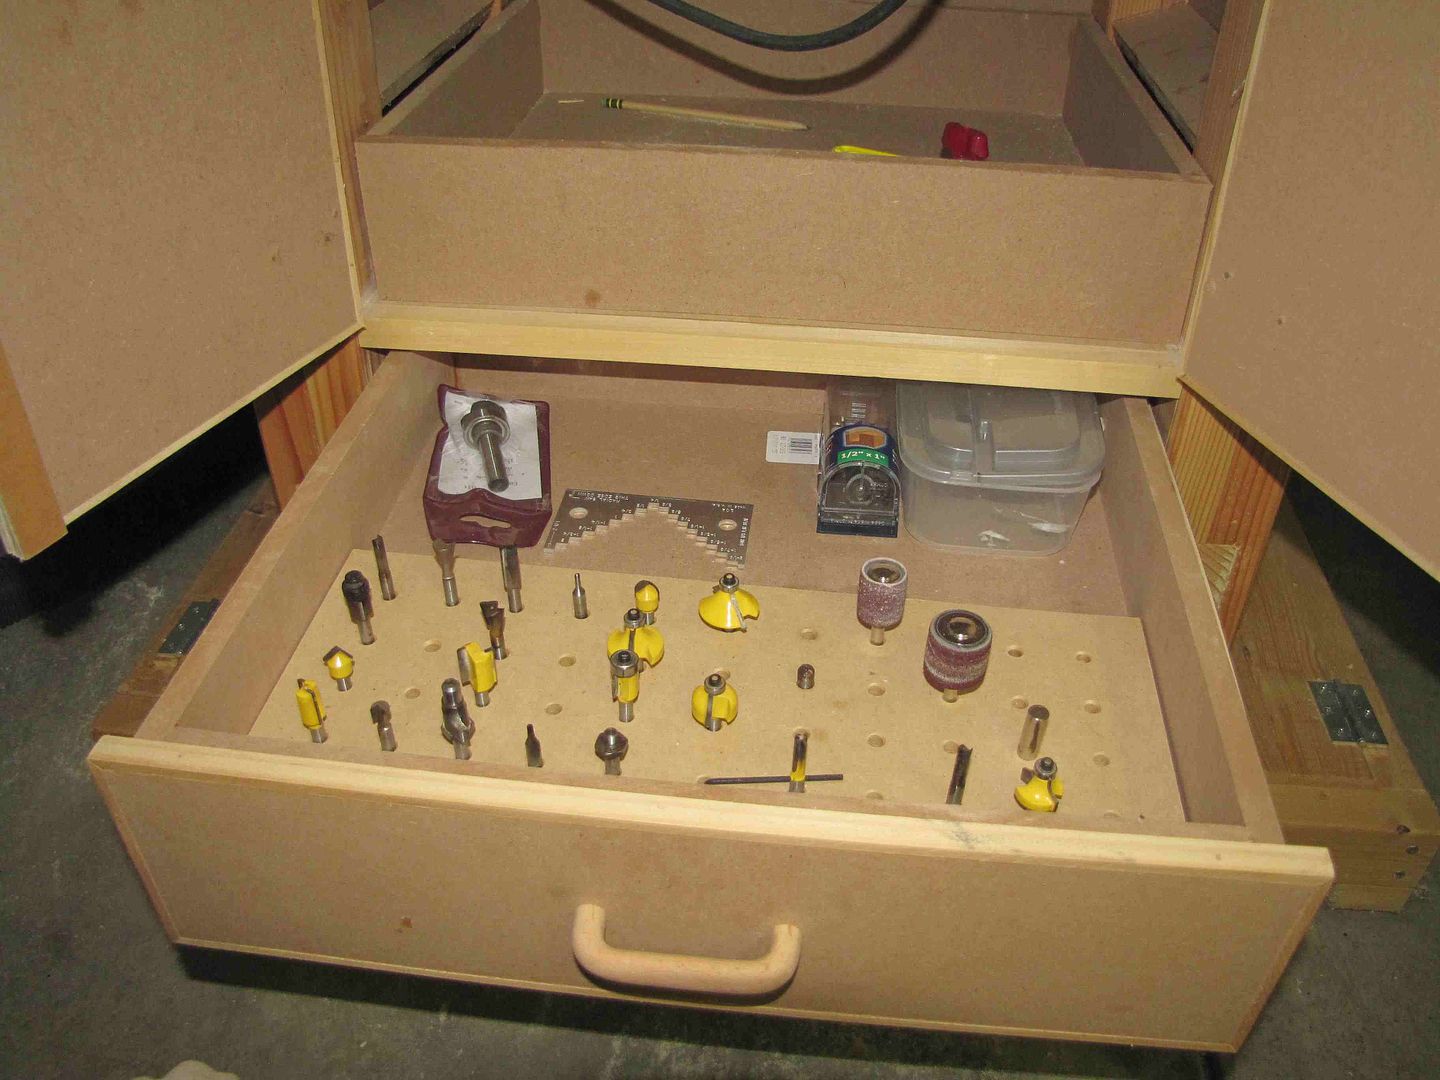
Of course, the cabinet could be redesigned in a way that would direct sawdust to the port. An extractor with more power than my ShopVac might also be better. As it is now, Ill just hand vacuum the inside of the cabinet.
*****
Read More..

Minggu, 22 Mei 2016

Really ingenious (and simple!) router table built by Domink in Germany. It even converts to a horizontal router table. The second video shows his home-made lift.
Thanks Domnik! Great idea.
Read More..

Kamis, 19 Mei 2016

Bruce (Wood Chuck)Bruce uses two router tables. For this one he purchased a Jessem top and fence and built the cabinet underneath for storage and dust collection.
This one is a horizontal router table Bruce built for milling molding and other things that are easier to rout flat, rather than on edge. Nice having the feather boards included on the fence.
Doug in Fredericksburg, VADoug sent over these pictures. His dog seems to approve. Doug also reminded me of the Router Workshop show on PBS. These guys make some incredible stuff. He also recommends RouterForums.com for answers to just about any router questions you might have.
Doug also has a handy tip along with the description of his router table:
One of my favorite tips for the router table is never sweep away debris with your hands... always use a broom. Cutters can be quite sharp if you catch them with your hand, and that aint second hand information. (Notice the broom on the table.) 
This table top was the Oak Park design used in the Router Workshop TV series on PBS. The cabinet is built out of luan plywood in a rolling cart frame I found at a store that was going out of business. It stores EVERYTHING, and weighs a ton so the table is quite stable even without locking the casters. The shelves slide out either side, and the only drawer slide hardware is the 1/4 inch hardboard bottom in a dado in the plywood. With a little wax they work surprisingly well, but they do get a little sticky in the humid summer. The big drawer on the top is the router bit storage. I have the bottom of the box lined with a 3/4 inch piece of MDF drilled with a grid of 1/4 and 1/2 inch holes. 
The lower drawers on the bottom are perfect for extra bandsaw and tablesaw blades. 
The fence is a piece of 4 inch aluminum angle iron milled to a perfect 90 degrees.
Read More..

Minggu, 24 April 2016

I found out the the reason my dovetail router bit was slipping last week when I was making my sliding-lid box. I never knew that you arent supposed to slide bits all the way into the routers collet. Apparently it doesnt hold as tightly, causing the bit to slip. Woodsmith Magazine has a tip describing a method to ensure your bits stay where they belong. (Sorry, they dont have a way of embedding it here.)***
Wood Bits is now Mere Minutes. More on this and the router bit tip in this video:
Read More..

Senin, 18 April 2016

Ive been working on the top for my router table and once again, am going back and forth on the fence. I was originally going to add some t-slots in the top to adjust and lock down the fence. But then I saw one that employs a clamping system on the edges of the table.
I like that idea because I wont have to make those slots in the top of the table. They get filled with dust and sometimes its hard to slide the fence if it binds in one direction. So Im still playing around with a design.
I got the hole cut in the top to hold the insert plate. Thats going to be really nice. Last week I mentioned that Kreg does not include the levelers with the plate. A little frustrating, considering they make no mention of that when you buy it. If they had a note on the package that said "levelers sold separately", that would be fine. Just let me know so I dont have to place a separate order!
I got the levelers and guess what? Kreg didnt supply 1 1/2" coarse thread wood screws that the instructions clearly state are included with the levelers. No big deal, I needed shorter screws anyway. I really love Kreg tools, but they need to tighten up some of their procedures.
*****
Mere Minutes
Read More..

Rabu, 30 Maret 2016

Really happy with the way this fence turned out. Its got a lot of weight to it, is square, and moves pretty smoothly. I found the clamping system in a great book called Woodworking With The Router
Read More..

Senin, 28 Maret 2016

When I set out to make my router table, I decided early on that I wanted to include a router lift. It makes it easy to raise and lower the router without having to reach underneath, and bits can be changed from the top of the table.
Lots of liftsI looked at a lot of different lifts. If you are ambitious, I highly recommend Matthaias Wandels incredible tilting lift over at Woodgears.ca. Put simply, Mathhias is a genius. He puts a lot of work into his plans are they incredibly detailed and accurate. For $14, its worth it.
On the other end of the home-made spectrum, Weekend Workshop on You Tube made an intriguing router lift using a car jack!
I decided to go in between these two and built a lift that was featured in issue 121 of Shop Notes magazine. It is a pretty simple concept, but was definitely a challenge to my skills. Thats the kind of project I like. It works really well.
Shop NotesI wanted to provide a link to the plan.
I contacted Shop Notes and strangely, they have no way to buy the plan online or even to buy the issue it was in! Uh, it was this year...January, 2012. Really old skool.
They have a lot of great projects and it seems to me like they are really missing the boat on this one. Even the Shop Notes web site is pretty lame. Cmon Shop Notes! Heres an opportunity to make some extra money.
So if you dont get Shop Notes and are interested in the plan, poke around a little. There are people selling back issues.
Read More..

Selasa, 22 Maret 2016

Benjamen JohnsonIf you want to learn how to make a serious router table, check out Bens Workshop. On his site, he has a great tutorial on how he made this. 
Jason OthoudtHeres another simple router table, yet Jason incorporated dust collection and various sized plates for the bit opening. I like the cost: $25.
I build it for about $25 out of CDX plywood and laminating 2 sheets of 1/4 ply (dont remember the type) over the CDX base for the top. I made other plates for smaller bits and the fence allows for attachment to my shop vac and has hardboard cover to close off the opening. I build it because I didnt like the height of commercial tables and I surly hated the price.
Ray ArnoldRays router table is a hybrid: mostly home made, but with a purchased fence and top. I love all the storage space.
This is a router table I made a few years ago, the top and the fence are from Woodpeckers, the rest I made, however I made a new face for the fence with a slot rail to mount feather boards an such, is from Woodpeckers, the rest I made. It is made of MDF and red oak and pine  It’s held up well.
Read More..

Selasa, 15 Maret 2016

I really need to check stuff out before I go blathering on. I thought yesterdays video was in German. I have an untrained ear. Thank you everyone who informed me that it is Dutch, or more specifically, Belgian Dutch: Flemish. Sorry!
Peter the Clown is awesome though. I like him in any language.
There seems to be a large number of Northern European Mere Mortal woodworkers. Ive really never been anywhere, but Scandinavia is one of those places that just fascinates me: I would love to visit. Vikings rule! (Hey, maybe that accounts for the hardiness of Minnesotans.)Martien de Boer, who is Dutch, sent me this joke about his southern neighbors:
How can you keep a Belgium guy busy for months? Tell him theres a bag of chips in the corner of the circle shaped room.
This is "vlaamse friet", served at a special booth called a"frietkot". According to Martien, "realBelgium chips are the most delicious chips in the world".But wait...that comes with beer??? Im there!!!
Hey you Vikings...send me pictures of your projects. Id love to see them and post them here. Like to see your shops too.
******
Mere Minutes
Read More..

Minggu, 28 Februari 2016

Discovery Channel has Shark Week, so why not Router Week here? Friday, Ill have two new videos on router basics. The first one will be an introduction to the router and cover primary techniques. The second video will be a simple project using just a straight bit and a roundover bit.In my shop I use my router on nearly every project I build. After my table saw, it is my next most important woodworking tool. Equally important is my router table. I rarely use my router in hand-held mode.I use an inexpensive Craftsman table, but eventually I will get around to making a table that suits me better. Last week I asked for you guys to send pictures of your router tables. Ill be posting them here all week. If youve been thinking about making one,  I hope these will give you some ideas. The possibilities are endless.Warren DownesWarren calls this a $15 / 15 minute router table. My kind of budget! (Note how the fence just swings on a pivot.)
I made this super cheap router table from scrap wood and a few bolts, im only new to wood working and had no idea how easy it was going to make my life, i seem to hardly take the router off the board. 
Its just a piece of MDF with the router bolted to it and pine for the fence held by a clamp on one end and a bolt and wingnut on the other. 
I can clamp it to my bench or table saw very quickly and takes up no room in the garage.
John Hendricks
Here is Johns router table. To call it just a "table" hardly does it justice.
It was a lot more work than I had planned on, and when I finished I was done with woodworking for awhile. All and all Im glad I spend all that time because I love this table. Its probably my best tool. When I got done I went out and bought a new router cause I couldnt bare putting my old router in this thing. I did a lot of research to incorporate different features. This is a combination of ideas from various places and a few of my own. Things I incorporated into the cabinet: 
-Laminated the top (both top and bottom for strength)
-Closed cabinet makes less noise
-Top is about 1 1/2" thick.
-Miter slide
-Can mount feather boards in miter slide or up on the fence
-A drawer for storing bits and other router stuff
-Dust collection
-Mobile base
-The fence slides on drawer rails. This was kind of tricky, but I love this feature. Lock down from back.
-Adjustable wings on each side of bit.
-Laminated wings so stock slides easy.
-A paddle switch to power on and off router without reaching under cabinet
-A pullout box under router to catch most of the saw dust, also for more storage.
-Lift. This was tricky, and I experimented with different ideas. Simplest idea worked best. Made two wooden gears with a belt between. Can adjust height from above table.
Read More..

Kamis, 25 Februari 2016

Overall, Im pretty happy with the way my router table turned out. I still cant use it until I make my router lift. I hope to get started on that soon so I can get this thing in use. Once in a while its fun to work on a really big project, and to me this one is huge, but I dont think I would have the patience to do it all the time. Looking forward to getting back to some smaller projects.
My wife showed me a picture she took at some store. It was a "jewelry tree". Basically, it looks like a tree without leaves: all sorts of branches. You store and display jewelry by hanging it from the branches. Rings, necklaces, bracelets...whatever. Sounds like a fun project. It was made out of metal but if I can, Id like to figure out a way to make it out of wood. Still pondering those branches.
I wanted to post this video with Fridays video, but YouTube has been foiling my effort for some reason. Finally got it uploaded today. Just to answer a few of the questions about this build.
*****
Read More..

Selasa, 23 Februari 2016

Getting started using your router.Videos for the total beginning woodworker. In part one youll learn basic techniques for using your router. It should be enough to get you up to speed and comfortable enough to move on to your first project: part 2: a simple picture frame.
Read More..

Selasa, 16 Februari 2016

Quick update. Plus, I got a new switch for my ShopVac. It must have been a pretty standard size: my local hardware store had it. I love it when things I think will be a hassle work out fine!
Mere Minutes
Read More..

Minggu, 14 Februari 2016

Paul Homes tells me the router tables with the pivoting fences are quite popular in Australia. He clued me into Gifkins, a web site that not only sells specialty jigs, but has free plans for a router table you can make yourself.(PDF) Next, head over to Martin Popes blog where he describes how he built his inexpensive router table. Check out his method for raising and lowering the router:
My low tech solution was two blocks of wood with a 45ish degree angle cut between them. A long slit was cut in one block into which a long bolt was passed through into a nut at the rear. As the bolt is turned it closes the blocks together which raises the router, screwing out the bolt lowers the router.
***
Mere Minutes
Read More..