Tampilkan postingan dengan label to. Tampilkan semua postingan

Jumat, 20 Mei 2016

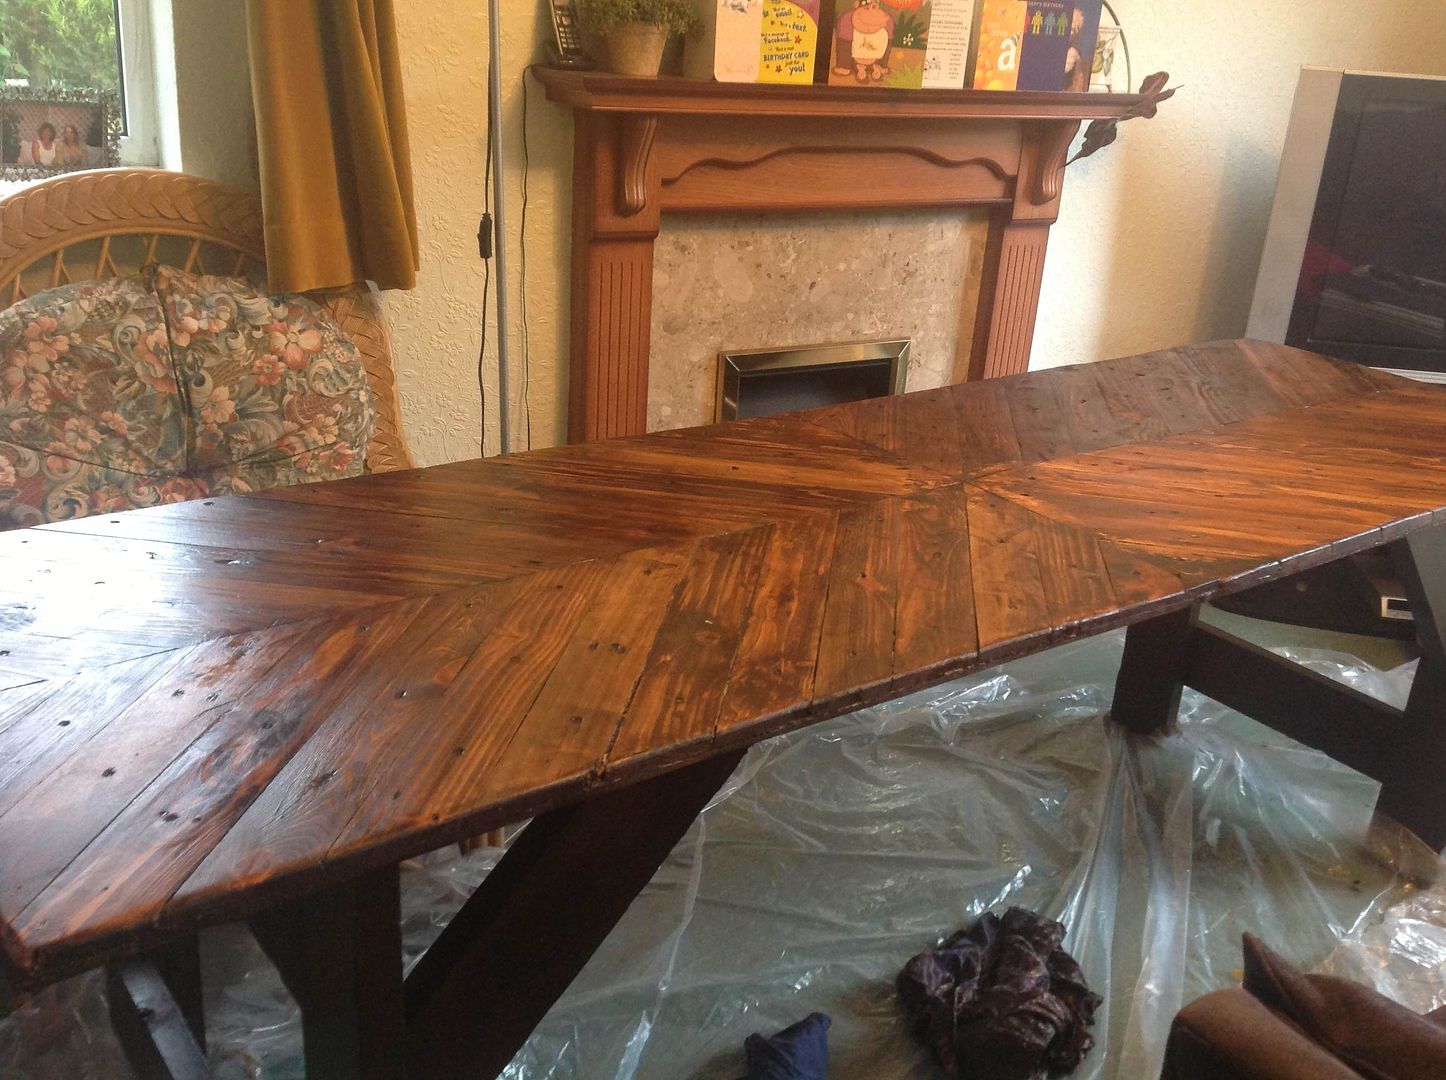
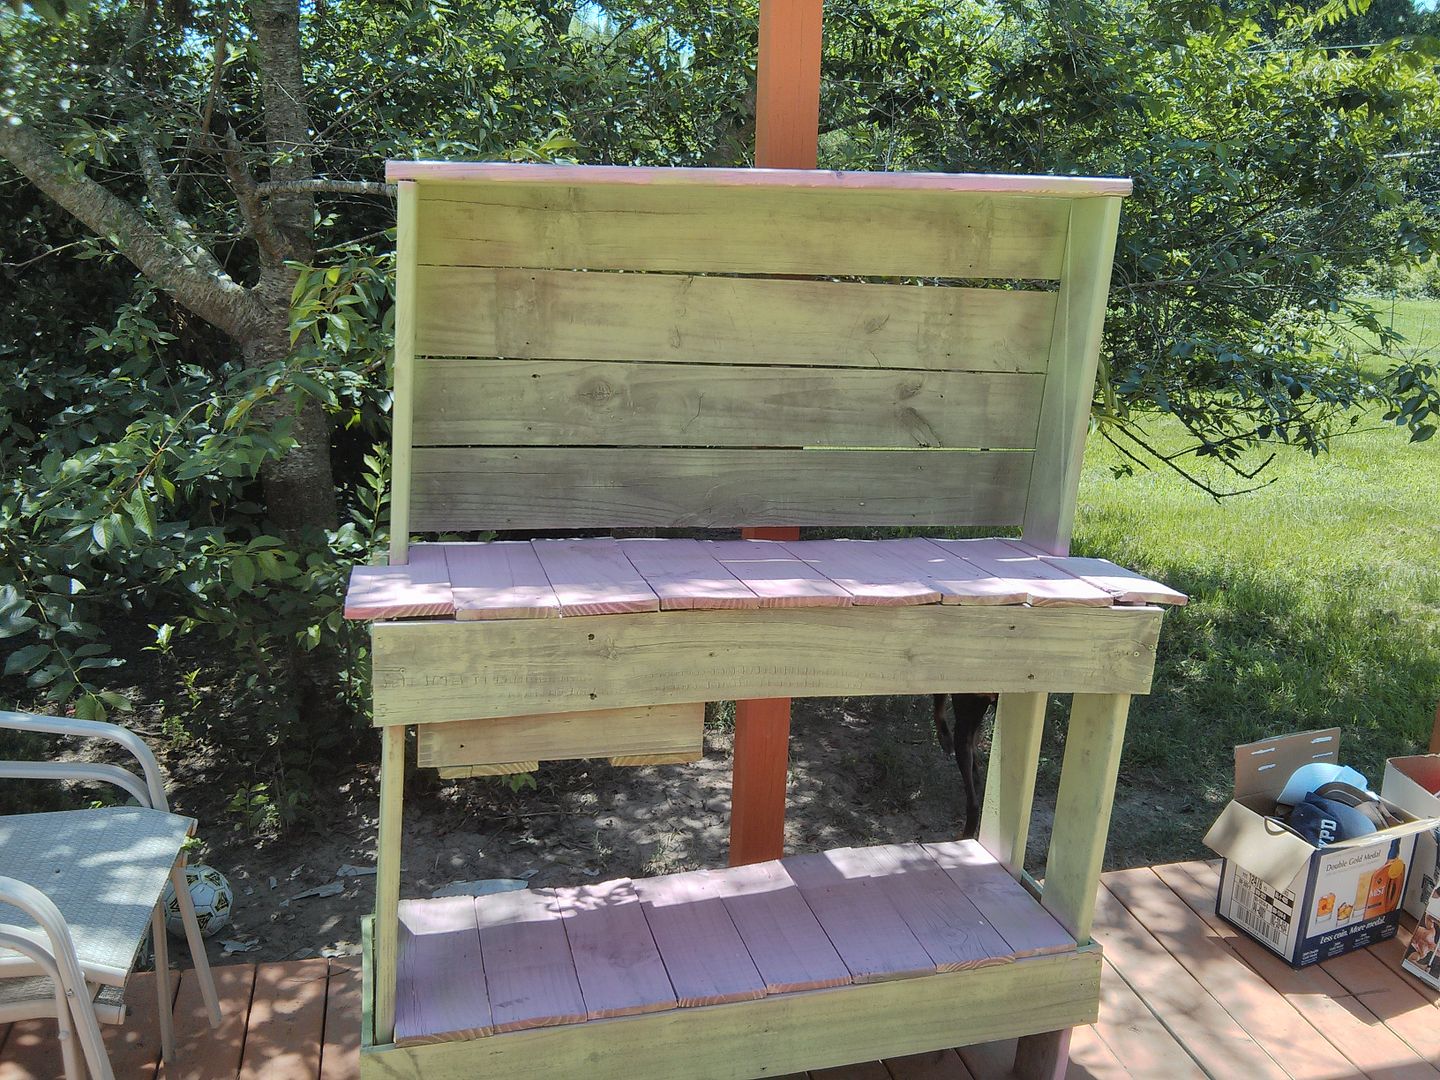
Mike Broughton calls this ten-foot table a "garden table". If it were a little smaller, it would make a great "farmhouse table" indoors. Mike built this using roof joists for legs and pallet wood for the top.
*****
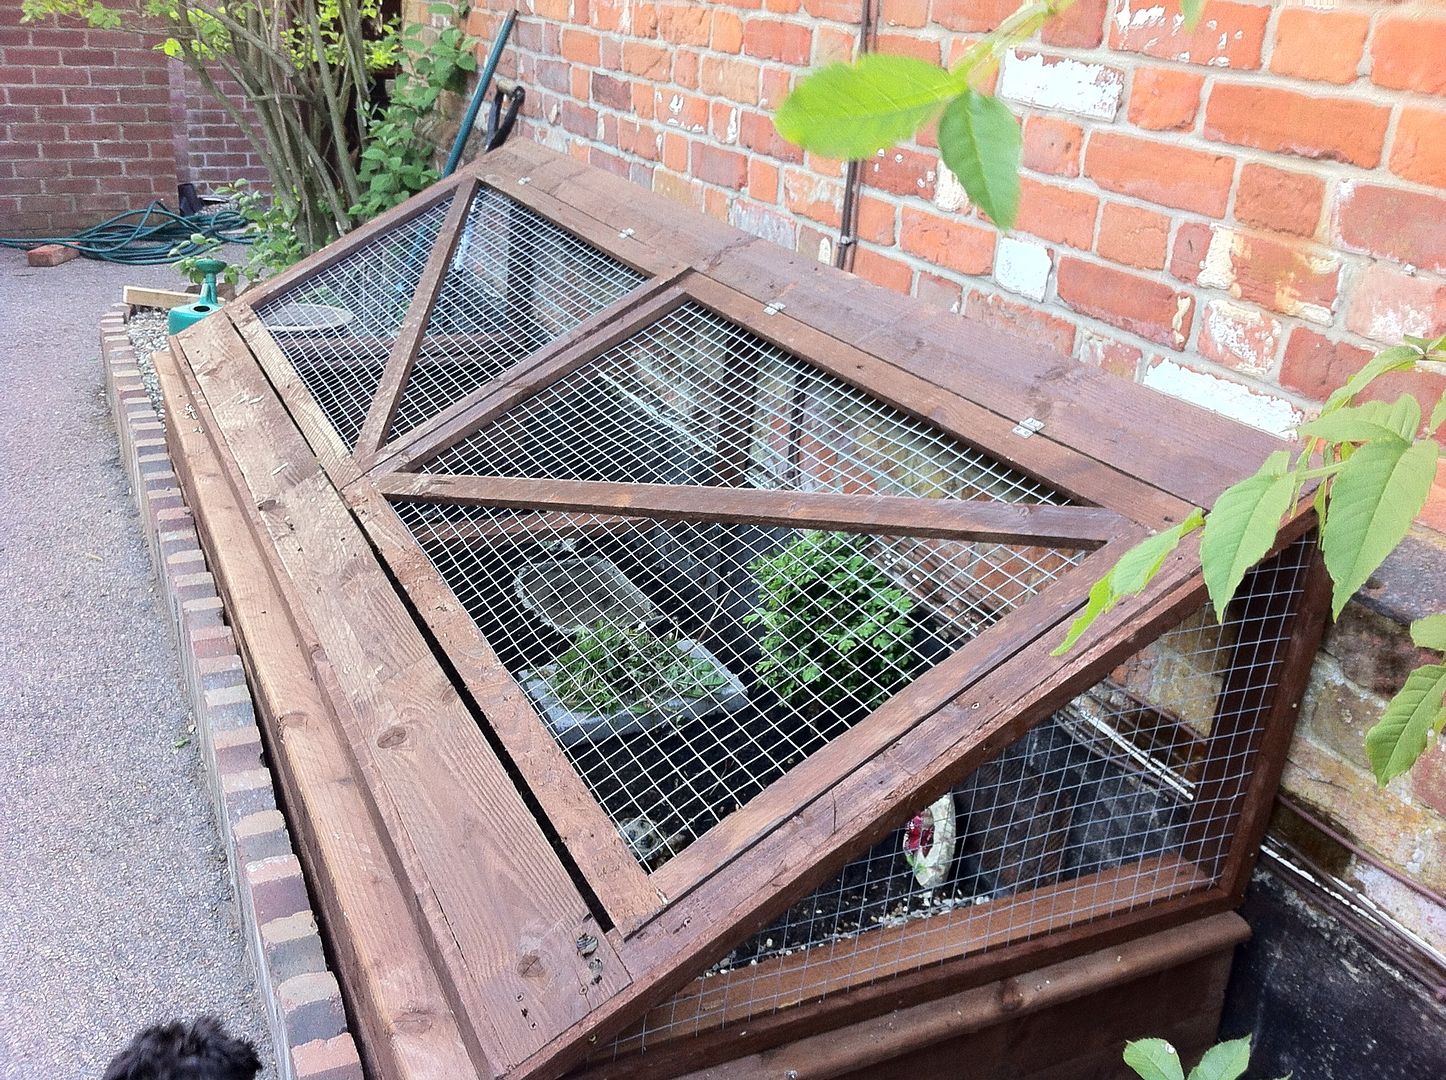
Ian Gooch used pallet wood for an unusual project. This is an enclosure for his wifes tortoises. This is the first tortoise cage anyone has sent me!
*****
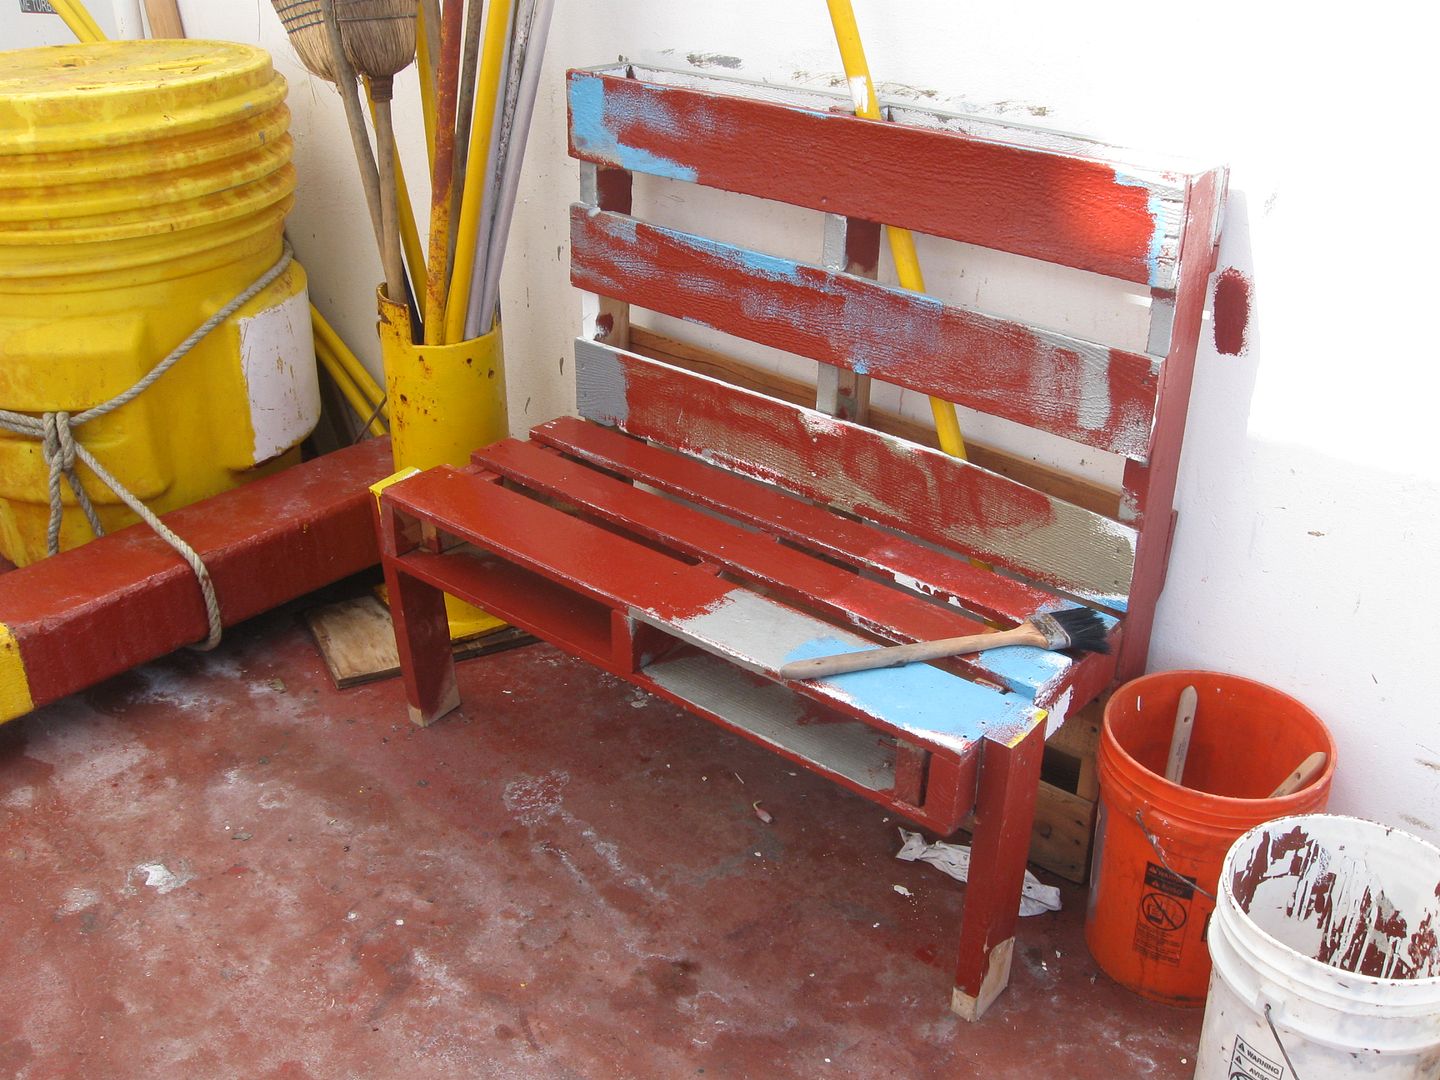
Doug Price sent me over an original pallet bench design someone made on his ship. (And the view from the deck!) Such a clever, utilitarian design. It looks like its being painted, but I think it looks great just like that: half-painted. Cool.
*****
How about a porch swing bird feeder? Dwayne Rieks, an American living in The Netherlands, tells me that it is not easy to find free pallets there. He managed to find a broken one at a job site who gave it to him without a fight,  though Dwayne says he was prepared to duke it out  because his wife wanted this bird feeder!
****
Heres 
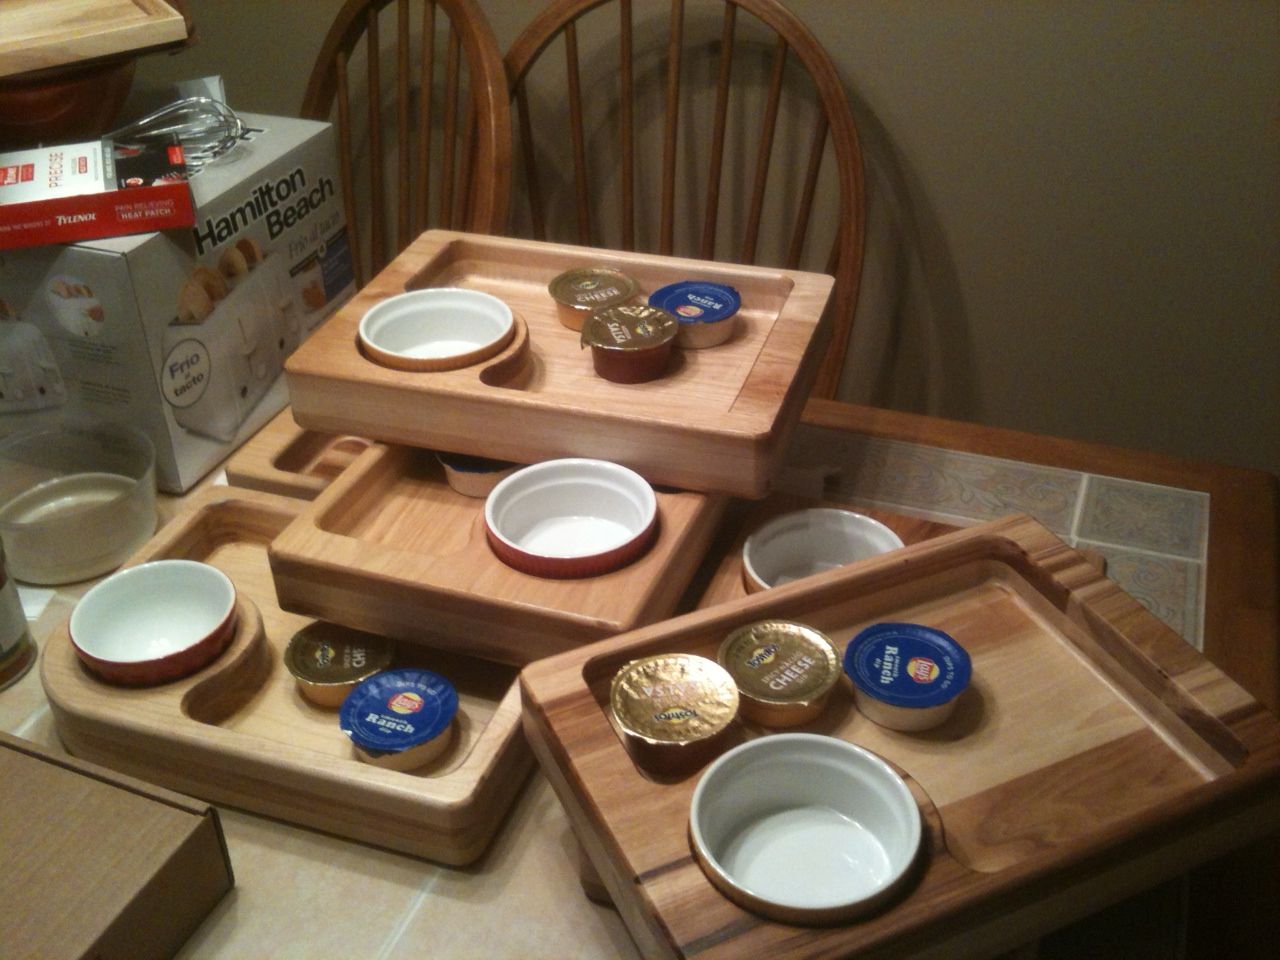
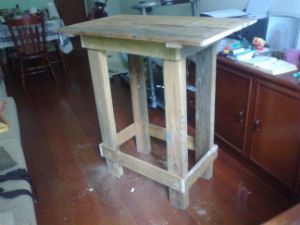
Marcelo Freitass pallet wood project. He made this table in his living room using only hand tools. 
*****
I love the muted colors on this potting bench Philip Hodge made out of old fence pickets. I like how potting benches are both functional and make great garden decorations.
*****
Berry Conway made his potting bench using pressure treated lumber and wood from an old fence that blew down.
*****
Three pallet projects from Alex Farrell, proving that pallet wood projects need not be rustic looking. These are beautiful. Bookcase, radiator cover, and mirror.
*****
Finally, Allan Voisin made this lamp using scrap 2x4s. Stained, then distressed with a bandsaw and Dremel tool. I love projects that find uses for cut-off that we all tend to save.
Read More..

Senin, 09 Mei 2016

After seeing a bunch of ads for wooden neckties, I decided to make my own. These things sell for $50 online, but you can make one with a little scrap lumber and elastic.
I think these would make great Christmas gifts. Wearing a wooden necktie is certainly a conversation starter!
If you would like to make one, heres a template.
*****
Read More..

Senin, 18 April 2016

Bongo CajónI received an email from Ted Derryberry recently showing me a plywood cajon he made for his percussionist friend. I made a regular cajon a few years ago, but had never heard of a bongo version. As with its larger, deeper sounding cousin, cajónes are traditionally made with plywood, and have a thin tapa (top) made from 1/8" plywood which acts as a drum head. Some, such as the one Ted made, include snares inside that press against the tapa. I left them out of mine.
WoodIf you have trouble finding 1/8" plywood, it is often sold at lumberyards as a "door skin", and I presume is used to dress up a drab door. I have also found small sheets of thin plywood at some craft stores. You will only need a piece that is about 7" x 16". And if you have no luck finding 1/8" ply, I suspect 1/4" ply would sound pretty good. In larger cajónes, the thin plywood flexes to allow for a deeper sound. I used 1/2" plywood for the rest of the drum. Its sturdy, yet lightweight.
ConstructionI jointed my pieces together with rabbets on the edges of the front and back, into which the sides fit. I cut dadoes (grooves) on the inside of the front and back to hold the divider, which gives the drum its two tones.
On standard cajónes, the tapa is screwed in place. This allows the player to adjust the tightness of the screws to create different tones. Due to the smaller size of a bongo cajón, I felt screws were unnecessary so I simply glued the tapa into place.
Playing I angled the two short sides in at an 8 degree angle. This makes the drum more comfortable to hold between your knees if you play it that way. There seems to be no "right" way of playing a plywood bongo. I also added curved cutouts on the bottoms of the sides so the sound would resonate out if the drum is played on a firm surface.
Free Plans
  • WWMM Bongo Cajon (pdf)
  • Sketchup version
  • Super simple versionIf you dont have a lot of tools or space, you can easily make your own plywood bongo drum! Cajónes were originally built by resourceful individuals using crates or old drawers. I like that the tradition of using an inexpensive material like plywood remains. It is somewhat ironic that music stores sell such expensive ones! So if you are a musician, make your own: its way cooler.
    Use a handsaw to cut the plywood pieces to size. You might even be able to get them cut to size at your local home center. If you can find free wood, all the better! (Be interesting to try this with pallet wood.)
    You will need:
    • 3 boards that are 16" x 6"
    • 3 boards that are 5.5" x 6"
    • To assemble it, just butt the pieces together and glue them. You can even use regular white glue. You will need to clamp the boards together to dry. If you dont have clamps, you can nail or screw the pieces together. Still use the glue...the fasteners will act as clamps. Let the glue dry for a couple hours and youve got a bongo cajón!
      It will sound good if you play it on your lap so the the sound can resonate out the bottom opening. You can also experiment by cutting some sound holes in the sides and see how that sounds.
Read More..

Rabu, 23 Maret 2016

Pallet wood shopping bag dispenser
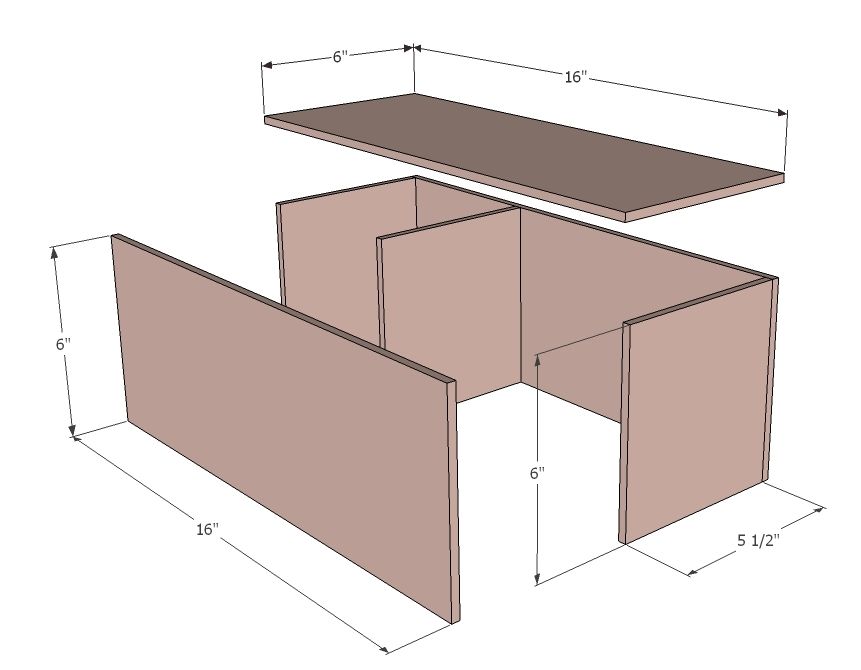
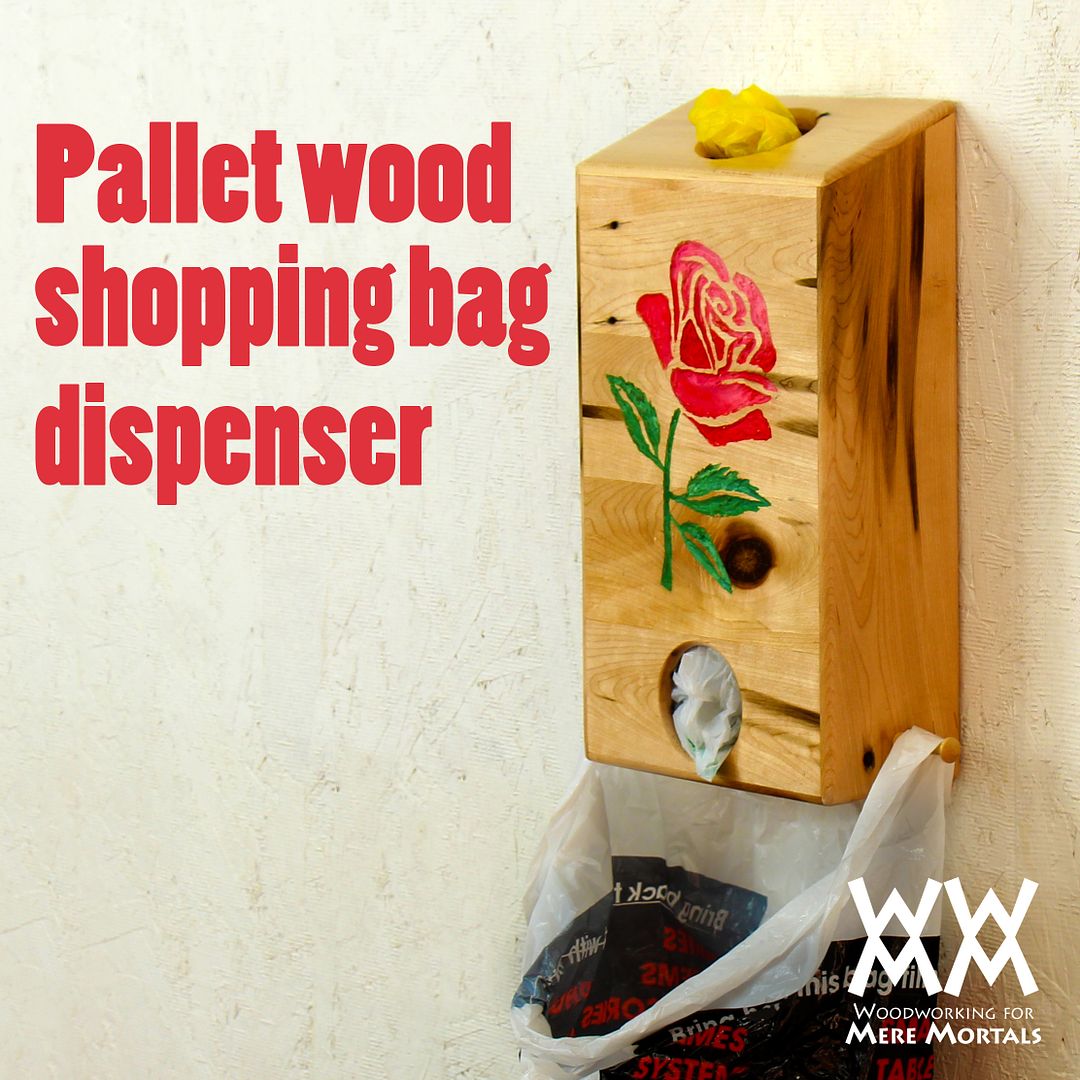
Inspiration for this project came from Tim Sluder, who suggested I come up with some way of storing those plastic grocery bags we all seem to save and reuse. (At least for now: many municipalities where I live are banning them!)This dispenser is a good way to keep the bags handy and Ive included a couple of shaker pegs (which Tim sent me a long time ago) to hold a bag to use as a waste basket. This would be a nice project for a pantry or laundry room.
I made mine out of pallet wood, this time cleaning it up with a planer and revealing its pristine state. It still retains nail holes and other marks, so it has character, but is not as rustic as my bath cabinet, for instance.
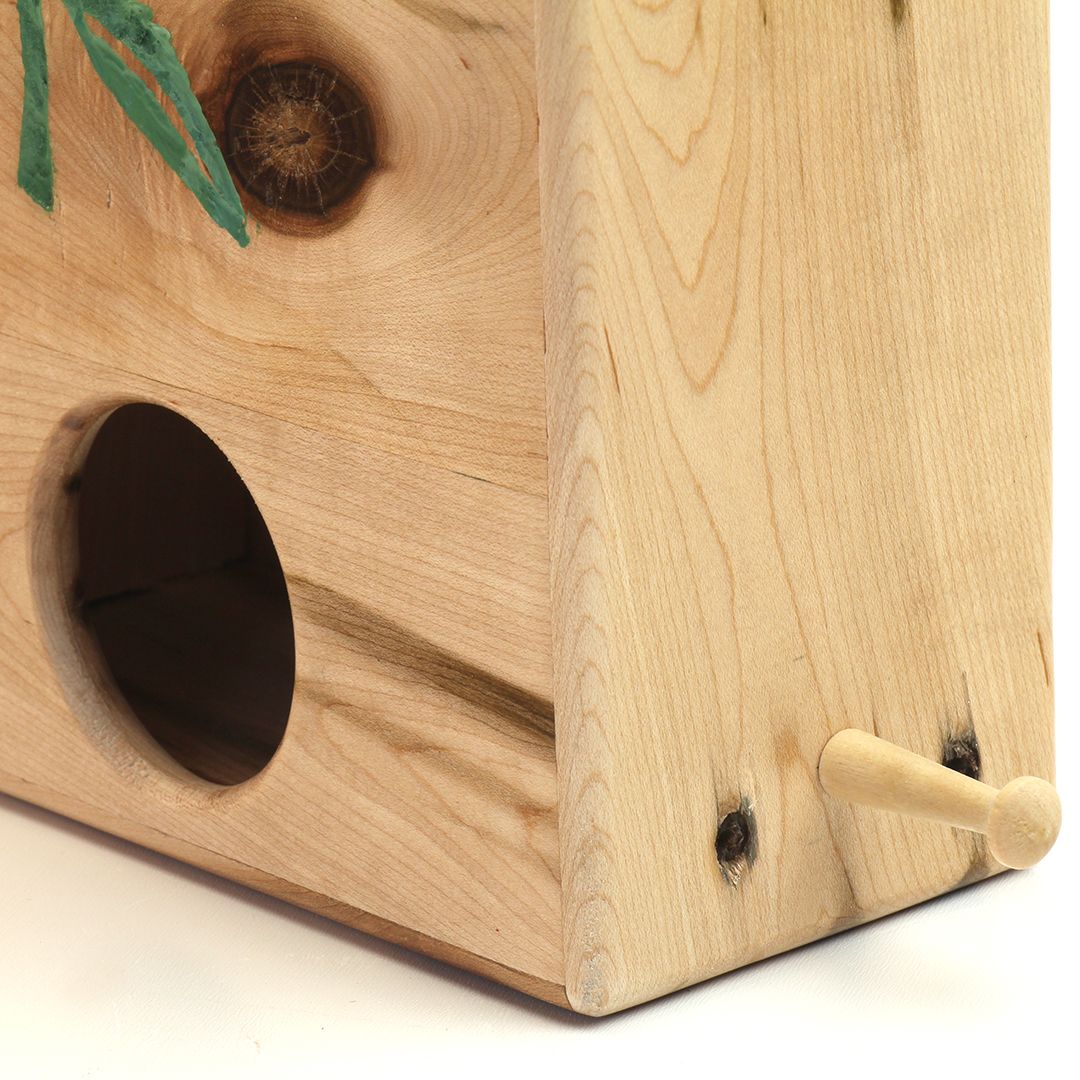
I also included an engraved and painted rose on the front. Its an easy process but youll need a Dremel tool. The trick to making a transfer from an ink-jet printer is to print it on something slick. I used the backing paper from a sheet of shipping labels. The ink will stay on it, but not dry. You can then press this onto your wood.
Free plans:
  • WWMM shopping bag dispenser (pdf)
  • SketchUp file
  • Own this dispenser. 
    I am going to start auctioning off some of my projects for charity. Since I make a new project every week, I have a lot of things I can do without. I thought about selling them, but Id rather my projects be used to make a small difference in the world.
    More specifically, I hope to improve the life of at least one child who has a life-threatening medical condition by donating 100% of the winning bid to the Make-A-Wish Foundation. If you (or someone you know!) would like to bid on this dispenser, the auction runs until next Friday. Please share the link to any non-woodworkers too.Ive signed and dated the back of this piece. If you are the winning bidder, Ill also throw in a couple Woodworking for Mere Mortals buttons. And Ill mention you in an upcoming episode. (Unless you prefer not, of course.)
    Click here to bid!
    Read More..

Sabtu, 05 Maret 2016

Heres a really neat technique I want to try. This guy transfers color laser prints to wood using an iron. Pretty cool.
Read More..

Sabtu, 13 Februari 2016

I always view this week...the one after Christmas...as a very odd week. Many people have the week off from work, and many people who are at work are hardly working. Its the doldrums of the year.
Look at it this way: Christmas is right around the corner. Less that a year away. Might as well get started on woodworking gifts.
Here are some projects that friends and families of viewers enjoyed unwrapping on Christmas morning. 
*****
John Hendricks was the chips & dip tray monster this year. Hes kind of lost track how many of these he made this year. Needless to say, these make great gifts.
*****
Bill Wilson is one of the busiest woodworkers I know.  He made this box based on no plans...just winging it and making it up as he went along. That is sometimes a really fun way to spend time in the shop. Let your creativity run.
Plus, he made some beautiful frames and heart-shaped candle holders.
*****
Alan Duke sent over some great signs that he made for his shop. Pretty much sums up my woodworking philosophy: 
Measure once - Cut once- Cut once again for good measure
Read More..

Sabtu, 06 Februari 2016

This project was inspired by Carmen Salamone who sent over a picture of a neat little wind spinner he made out of cedar. I have seen these before: they seem to be common at craft fairs. I can understand why. They are super easy to make and there is a lot of room for customization. They have a pretty good profit margin.
Woodworking optionsFor mine, I used stock 3/4" pine boards and ripped them into 3/4" strips, which I then cut to various lengths. This was all very simple on my table saw but if you dont have one, you might be able to find thin strips of wood at your local home center that will do the trick. You can cut them to length using a hand saw or jig saw.
The only other bit of woodworking involves drilling a hole through the center of each piece. I used my drill press to speed up the process and to ensure they were all centered, but you should be able to drill holes with a hand drill. Mark the centers carefully so the finished spinner will be balanced.
HardwareI used a length of 1/4" threaded rod and attached an eye bolt to one end using a coupler. I locked these into place with a thread sealant (Loctite) and attached a swivel clip to the top. We havent had any strong winds since I built this but I would like for it to spin in slight breezes, so I am going to try a barrel swivel instead and see if that spins better. You can find these at sporting goods stores: fishermen use them to attach lures to lines.
Get creative!The fun of this project is really in the decorating and painting. I chose to make a rainbow pattern on mine because I like bright colors and wanted this to contrast with all the earth tones outside. This would be a great project to get the kids involved!
*****
Read More..